
Who says that a dish with a reputation for being “fussy” and demanding a Michelin-star kitchen can’t be rustled up under the pines?
I’m talking about risotto. That creamy, dreamy Italian comfort food. It sounds insane, right?
But here’s the secret: risotto is actually the perfect campsite meal.
It requires only one pot. It rewards patient stirring.
Table of Contents
I. The Argument: Why Risotto Wins the Camping Game
So, before you write this off as some foodie fantasy, let’s look at the facts. This isn’t about being fancy for the sake of being fancy.
This is a practical, one-pot, high-reward technique that has been cleverly adapted for the unique challenges of outdoor cooking.
We are going to focus on a foolproof method. Think of it as “The Golden Ratio” of rice to liquid. We’ll also cover the crucial art of heat management, whether you’re using a hissing camp stove or a bed of glowing coals.
- The Vibe: Sophisticated yet undeniably rustic. You’re an outdoor gourmand, not a survivalist.
- Difficulty: Let’s call it “Moderate.” It requires your attention, but the technical skill level is low. If you can stir a pot, you can make this.
- Prep Time: A mere 10 minutes. Do this at your campsite table, preferably with a view.
- Cook Time: About 25 to 30 minutes.
II. Gear Up: What You'll Need to Pack
Heading into the wilderness unprepared is a bad idea for many reasons. Making risotto without the right gear is one of them.
Don’t worry, the list is short and sweet.
First, the most important piece of equipment: The Pot. You cannot use some flimsy, thin-walled thing.
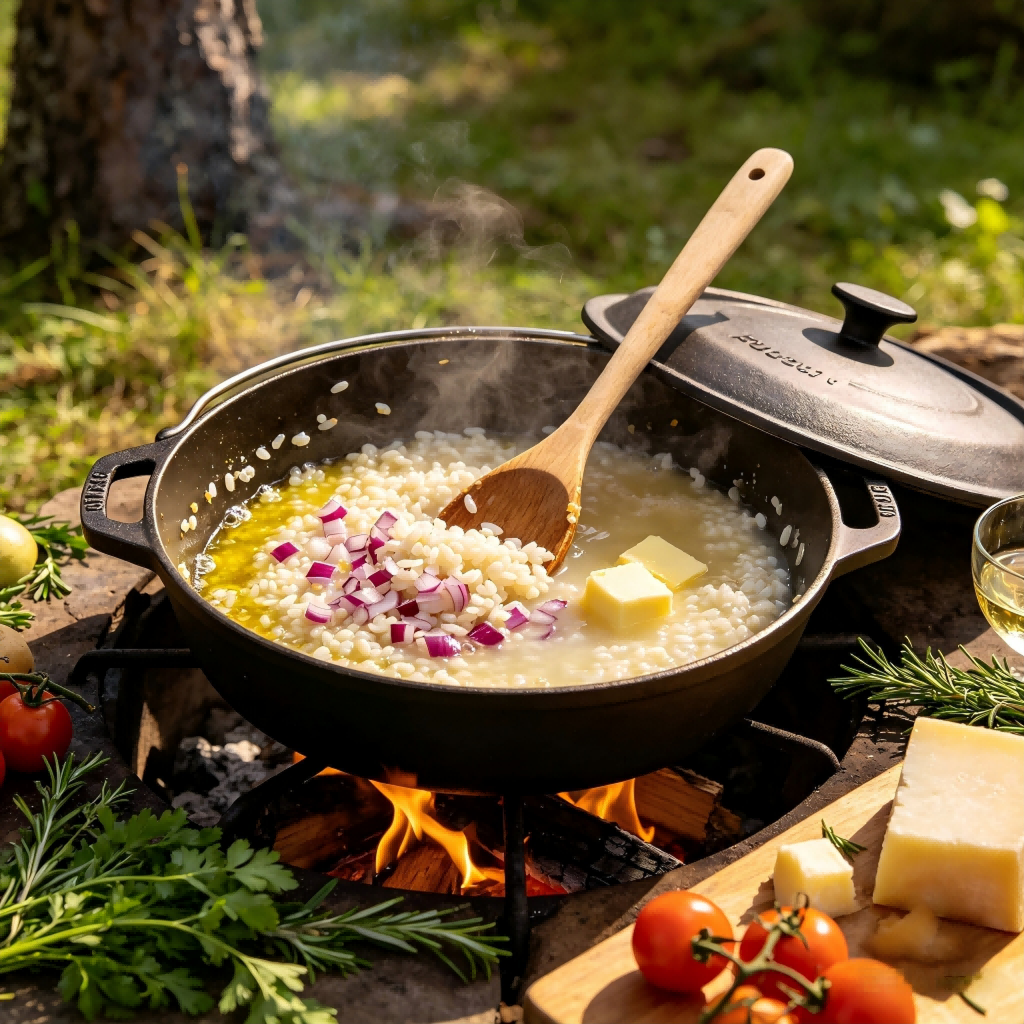
You need a heavy-bottomed pot or, the ultimate campsite cookware, a cast-iron Dutch oven.
Its weight might make your back ache on the hike in, but its ability to distribute heat evenly will save your risotto from a burnt, sticky grave.
Next, you need The Stirrer. Find yourself a sturdy wooden spoon. Silicone will technically work, but let’s be honest, a wooden spoon just feels more appropriate.
It has a certain “lumberjack-chic” aesthetic that really ties the whole campsite kitchen together.
Finally, let’s talk strategy. The Pre-Trip Prep. This is crucial. Do not wait until you’re at the campsite, fumbling in the dark, to chop your onions.
Do it at home. Measure your rice at home. Put your pre-chopped onions and measured rice in little zip-top bags.
Future You, tired and hungry after a day of hiking, will be eternally grateful.
III. The Shopping List: Ingredients That Love the Outdoors
Gathering your ingredients is half the fun.
Here is what you need, with a focus on items that won’t spoil or get crushed in your backpack.
- The Base: You need Arborio or Carnaroli rice. This is non-negotiable. Their high starch content is what creates that signature creaminess. Regular long-grain rice will just give you sad, watery porridge.
- The Aromatics: Pack a shallot or a small yellow onion. And bring a good amount of garlic. More garlic than you think you need. Always.
- The Liquid Gold: Leave the bulky cartons of broth at home. Grab some chicken or vegetable bouillon cubes or powder. They are lightweight, packable, and you just mix them with water from your canteen. Genius.
- The “Fat”: Bring a small bottle of good olive oil or, my preference, a stick of salted butter. Butter makes everything better, especially at 8,000 feet.
- The Flavor Boosters:
- A mini-bottle of dry white wine. They sell them specifically for this purpose. It’s not optional; it’s essential for that acidic pop.
- A hunk of hard Parmesan cheese. The kind that doesn’t need to be refrigerated. Grate it at the campsite for maximum flavor impact.
- Optional but awesome: A small bag of dried mushrooms (rehydrate them in warm water), a handful of fresh spinach (it wilts down to nothing), or some pre-cooked sausage sliced up.
IV. Cooking Instructions: Let's Make Some Magic
Alright, the fire is crackling, the stove is lit, and your ingredients are ready. Let’s do this. Put on some music, pour that drink, and get ready to stir.
1. The Toast (Tostatura)
Start by heating your pot over a medium flame. Add a glug of olive oil or a generous knob of butter.
Toss in your pre-chopped shallot or onion. Sauté it until it’s soft and smells amazing. Now, add your dry rice.
Stir it around so every grain gets coated in that lovely, hot fat. You want to “toast” the rice for a couple of minutes until the edges become translucent.
It shouldn’t brown, just get warm and slightly shiny. This step locks in the starch.
2. The Deglaze (The Fun Part)
This is where you get a little drama. Pour in that mini-bottle of white wine. Stand back and listen for that glorious, satisfying sizzle as the wine hits the hot pot.
It’s the sound of dinner getting serious. Stir everything together, scraping up any tasty bits from the bottom, and let the wine bubble away and mostly evaporate.
3. The Low and Slow (Find Your Zen)
Now, we begin the rhythm of risotto. This is the “zen” moment. Ladle in your warm broth (just water mixed with your bouillon cube) – one ladleful at a time.
Stir it gently but constantly. Wait until the rice has mostly absorbed the liquid before adding the next ladleful.
It might seem tedious, but it’s meditative. It forces you to stand by the fire, sip your drink, and just be present.
Do this for about 20-25 minutes. The rice should become creamy on the outside and slightly firm (al dente) on the inside.
4. The Mantecatura (The Grand Finale)
Your rice is cooked. It’s good, but it’s not great yet. Now comes the final, glorious step: the Mantecatura.
Remove the pot from the direct heat. This is crucial. Drop in another generous knob of butter and a big handful of that grated Parmesan cheese.
Now, beat the risotto with your wooden spoon like it owes you money.
Stir vigorously until the butter and cheese melt into the rice, creating a beautiful, emulsified, creamy cloud of deliciousness.
5. The Rest (Find Its Soul)
I know, I know. You’re starving. But you have to wait. Just two more minutes. Cover the pot and let the risotto rest.
This is not torture; it’s science. It allows the starches to relax and the flavors to meld.
It lets the dish “find its soul,” as they say. Use these two minutes to set out the bowls and plates.
V. Pro-Tips & Clever Twists
You’ve mastered the basics. Now, let’s talk about how to get creative and save your bacon if things go slightly wrong.
- The “No-Waste” Strategy: Did you grill some veggies in a foil packet last night? Leftover zucchini, bell peppers, or corn? Chop them up and stir them in during the last few minutes of cooking. Instant flavor upgrade and zero food waste.
- Heat Management is Key: The dreaded “bottom-burn” is the number one enemy of the campfire risotto chef. On a camp stove, keep the flame low. On a grate over coals, you have more control. You can actually slide the pot partially off the heat to slow down the cooking, or move it to a cooler spot if it’s getting too aggressive.
- The “Cheater” Method for the Impatient: Are you too hungry to wait for a 30-minute stir? I get it. No judgment here. You can use “par-boiled” or “quick-cook” Arborio rice. It won’t be quite as transcendent, but it will still be a million times better than a burnt hot dog, and it shaves a good 10-15 minutes off the cooking time.
Conclusion
This isn’t just a meal; it’s an activity. It’s a reason to slow down, to linger by the fire, and to actually engage with the process of making your food.
As the cheese is stirred in and the first stars begin to pepper the darkening sky, you’ll realize the “fussy” reputation was just a silly myth.


