
You’re three miles from camp.
Your water bottle holds 500 ml – your last clean water.
You slip on a wet log.
Your shin splits open.
You see dirt, pine needles, and a dark smear of blood.
Your first instinct? Reach for that bottle and drink.
Stop.
That bottle is not for your throat right now.
It’s for your wound.
Here’s the hard truth: mild dehydration won’t kill you.
Infection can take your leg.
I’ve seen it happen to tough, experienced hikers who “didn’t want to waste water.”
They wasted their window instead.
So let’s run the protocol.
Read it once. Memorise it. Next time, you act without thinking.
Table of Contents
Step 1 – Your cleanest water is your only water
That filtered, boiled, or treated water in your bottle – it’s your sterile field.
Not for sipping. Not for cooking.
Reserved for one emergency: flushing an open cut.
You might be parched.
Your mouth might be dry.
But a healthy adult can go hours without water and recover fully.
A single bacterium in a deep wound doubles every 20 minutes.
At one hour, one becomes eight.
At two hours, sixty‑four.
By the time you reach help, billions.
Your immune system can’t fight that curve.
Only mechanical flushing can disrupt it.
So yes – pour your last litre into that gash.
I’ve done it. My clients have done it.
We walked out thirsty. We walked out with all our toes.
Step 2 – Pressure, not drizzle
Water alone won’t cut it.
You need force – a jet that blasts out grit and bacteria.
Take your plastic water bottle.
Poke a single small hole in the cap – about the size of a ballpoint pen tip.
Fill it with your clean water.
Screw the cap on tight.
Aim the hole directly into the deepest part of the wound.
Squeeze as hard as you can.
You want a thin, high‑speed stream that shoots two or three feet.
That stream gives you about 5 to 8 PSI.
Perfect – removes debris, doesn’t damage tissue.
(Above 15 PSI, you hurt healthy cells.)
Angle the bottle at 45 degrees.
Never point straight down – that pushes dirt deeper.
Let gravity carry the dirty water out and away.
Rotate the limb and flush from multiple directions.
Squeeze for at least 30 seconds continuously.
Pause, inspect, repeat.
Your hand will cramp – that means you’re doing it right.
Step 3 – Add soap – it changes everything
If you have mild soap – camp suds, Dr. Bronner’s, even a tiny squirt of dish soap – use it.
Skip antibacterial kinds; they irritate tissue.
Add just one pea‑sized drop to your clean water.
Swirl gently – you don’t need thick suds, just a slight slickness.
Soap breaks surface tension.
Plain water beads up and rolls over oily debris.
Soapy water seeps into every microscopic fold and lifts biofilm.
That biofilm is where bacteria hide and multiply.
Flush with the soapy jet.
It dissolves grease, dislodges clinging particles, and breaks sticky proteins.
After the soap flush, if you have extra clean water, give a final rinse.
If you’re down to your last half‑litre, skip the rinse.
Soap residue is less harmful than the bacteria you just washed out.
Yes, it stings.
That sting lasts five seconds.
Tell your patient – or tell yourself – to bite down and let it work.
Step 4 – Never, ever use untreated surface water
This rule has zero exceptions.
No lake water. No stream water. No snowmelt – unless boiled or filtered immediately.
That crystal‑clear mountain creek?
It looks clean. It tastes clean.
But it carries Aeromonas, Flavobacterium, and other environmental bacteria.
Your stomach acid can handle them.
Your deep muscle and fat layers cannot.
Pouring that water into a wound is like injecting a microbial slurry into a warm incubator.
I’ve seen a simple scratch turn into a necrotising scare within 48 hours – all from “beautiful” creek water.
If you run out of treated water, you have two options:
Walk to a reliable source and treat it (boil for one minute, or use a 0.2‑micron filter).
Or collect rainwater, melt clean snow, and treat it.
Do not rinse with raw water just because it’s convenient.
If you have no treated water at all, skip irrigation.
Dress the wound dry – it’s suboptimal, but safer than introducing foreign pathogens.
Then evacuate as fast as you can.
But in most cases, you still have clean water left.
You just have to be willing to use it.
Step 5 – Clean immediately – the clock is ticking
Every minute you wait, bacteria multiply.
At 20 minutes – double.
At 40 minutes – quadruple.
At one hour – eight times the original load.
That’s why you don’t wait to get to camp.
You don’t wait for a flat rock or a comfortable spot.
You drop your pack right there on the trail.
You pull out your bottle, poke the hole, and start squeezing.
The first hour is your golden window.
Within that hour, mechanical flushing removes over 90% of contaminants.
After that, bacteria start adhering to tissue and forming biofilms.
Those are much harder to dislodge.
Train yourself to treat every deep cut as a code‑red emergency.
Speed is your best antibiotic.
Step 6 – Flush until the run‑off is crystal clear
How much water? At least 200 ml.
For a gash longer than an inch, plan on 500 ml – your entire bottle.
How do you know you’re done?
Look at the liquid flowing out of the wound.
Keep flushing until it’s completely free of dirt, sand, blood clots, or dark specks.
Tilt the limb so the water runs away from the body.
Gently spread the wound edges apart – it’s uncomfortable, but necessary.
Shine a headlamp or phone light into the base.
If you see any glint or speck, flush again from a different angle.
It may take three or four cycles.
Each cycle consumes 50–100 ml.
Don’t cut corners – that tiny black dot could cause a tattoo or a chronic infection.
Pro tip: after you think you’re done, wait 30 seconds, then flush one more time.
Tissue relaxation often releases hidden debris.
That final flush has saved many wounds from going bad.

The one‑hour finish line
All of this – the decision, the pressure, the soap, the volume, the visual check – must happen within 60 minutes of injury.
That’s your deadline.
Skip lunch. Delay your tent setup.
The first hour is the only time when irrigation alone can reliably prevent infection.
After that, you’re in the realm of antibiotics and possible surgical debridement – neither available in the backcountry.
Final field notes
· Volume – 200 ml minimum, 500 ml better.
· Pressure – jet, not drizzle.
· Soap – if you have it, use it.
· Source – only treated or boiled water goes in.
· Time – one hour, no excuses.
Pack an extra bottle on your next trip.
Label it “WOUND ONLY” with a marker.
That way, you won’t be tempted to drink it when you’re thirsty.
When the moment comes – and it will, because accidents happen – you’ll have everything you need.
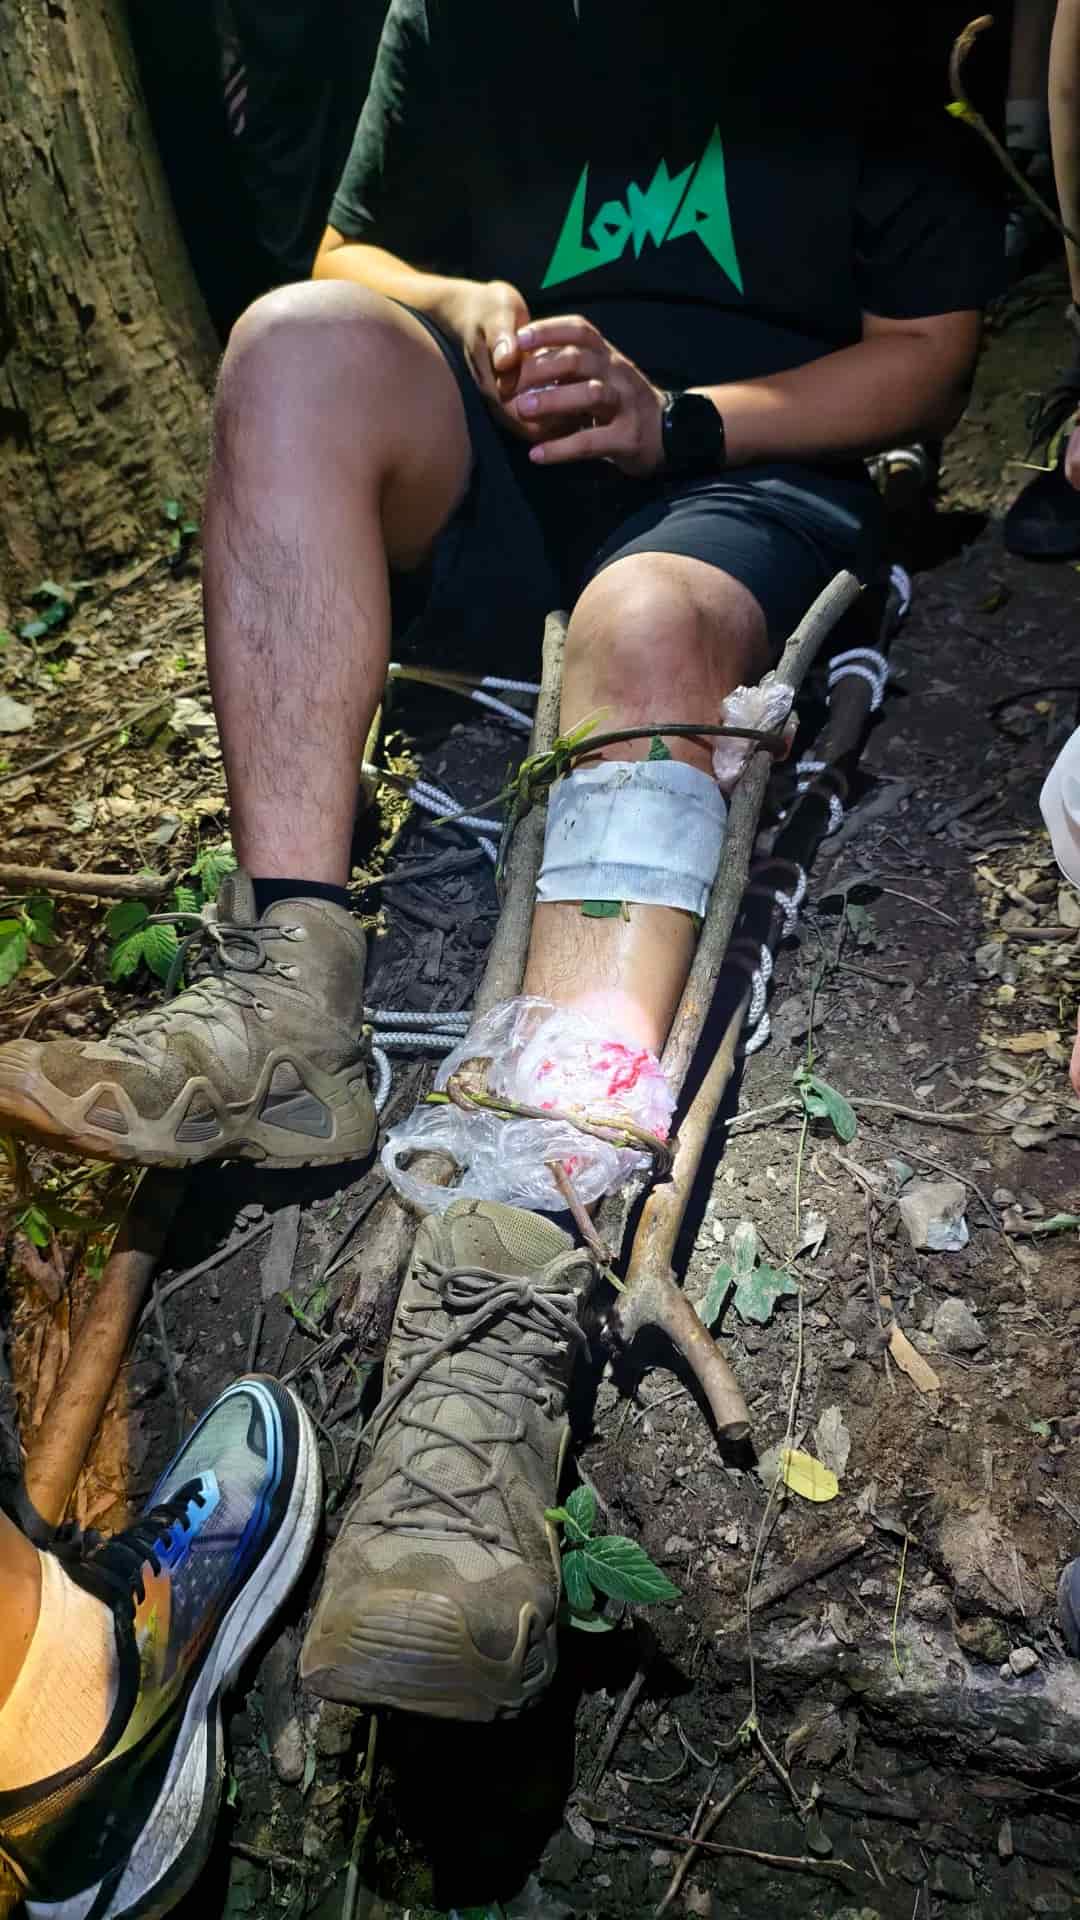
After you flush, cover the wound with a sterile dressing or the cleanest fabric you have.
Keep it dry.
Reassess every few hours for redness, swelling, or warmth – those are early warning flags.
If they appear, you may need to repeat the flush, but the primary battle is won or lost in that first hour.
Remember the trade‑off: a dry throat for a few hours versus a lifetime with all your limbs.
Choose wisely.
Now go pack that extra bottle.
Not for sipping – for saving.
Your legs will thank you.
Stay sharp. Stay safe. And never hesitate to sacrifice a drink for a wound.


