For years, I approached camp cooking with the finesse of a hibernating bear.
My cooler was a black hole of disorganization, my eggs were a constant liability, and I’ve created more dirty dishes at a campsite than I do in my own kitchen after Thanksgiving.
It was a messy, chaotic, and often soggy affair.
But through trial, error, and several tragic incidents involving spilled pancake batter and disintegrated egg cartons, I’ve evolved. I’ve honed my skills.
I’ve become a person who can actually enjoy a hot meal in the woods without wanting to use my only roll of paper towels to cry into.
Let me walk you through my 10 absolute favorite camping food hacks.
These are the tips and tricks that have saved my sanity, my appetite, and my marriage.
Let’s get into it.
Table of Contents
1. Pack Your Cooler in Reverse (Or, How to Avoid Becoming a Cooler Digging Gremlin)

Let’s start with the foundation of all camp cooking: the cooler.
For most of my life, I packed a cooler like I was playing a frantic game of Tetris while blindfolded.
Things went in based on shape and my general level of panic. The result? Every time I needed a stick of butter, it was a full-scale archaeological dig.
I’d have to unpack half the cooler, letting all the cold air escape, while my hands turned into numb, sausage-like appendages, all to find the burger buns I’d inevitably buried under three gallons of iced tea.
The solution is so stupidly simple it’s almost offensive: Pack your cooler in reverse order of your meals.
Think about it. You’re not going to eat your Day 3 chili on the first night. So why is it lurking at the very top, taunting you?
Here’s the method to the madness:
• Day 1 Meal (Dinner, then next day’s Breakfast/Lunch): Right on top. This is your immediate-access layer. Burgers, buns, that first night’s pre-chopped veggies, the bacon for tomorrow morning.
• Day 2 Meals: Right below that. Your next set of provisions.
• Day 3 Meals: You guessed it, hanging out at the very bottom, chilling peacefully until their time has come.
This keeps everything simple and logical. No more frantic rummaging. No more disorganized digging for small items.
You open the cooler, grab what you need from the top layer, and close it.
The cold stays in, your sanity stays intact, and you don’t look like a racoon rummaging through a dumpster.
2. Frozen Meat: The Cold-Hearted Hero Your Cooler Deserves
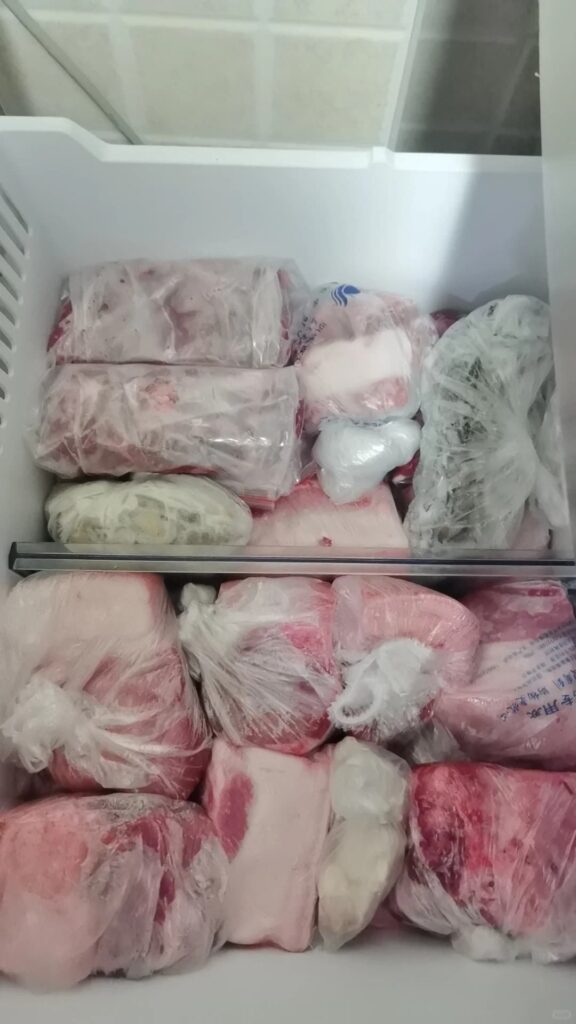
I have a new rule in my life: if it’s meat, and it’s going camping, it must be frozen solid.
I’m talking steaks, chicken breasts, packs of bacon, sausages—anything that can handle a stint in the deep freeze.
I treat my freezer like a cryogenic chamber for my future camp feasts.
Why is this such a game-changer? Two glorious reasons:
1. It keeps your meat fresher, longer. That frozen block of steak is slowly thawing from the inside out over the course of your trip, meaning it’s perfectly safe and fresh for Day 2 or even Day 3. You’re not gambling with the food safety timeline.
2. It’s FREE extra ice! Think about it. Instead of a pack of chicken just being cold, it now makes other things cold. It’s no longer just food; it’s a functional cooling unit. Your frozen steaks are working double-duty, keeping your cheese, milk, and yogurt cold as they slowly relinquish their icy grip.
It’s a win-win. Your meat stays safer, and your cooler stays colder for longer. (I’ve got a whole other post on Cooler Hacks if you want to go further down this beautifully chilled rabbit hole).
Frozen meat: it’s not just dinner, it’s your cooler’s best friend.
3. Pre-Chop Your Vegetables: Because Nobody Wants to Wield a Knife Half-Asleep

There is a special kind of misery that is dicing an onion at 7 AM on a picnic table while mosquitos use your ankles as their personal breakfast buffet.
The cutting board is wobbly, your knife is probably dirty from last night’s dinner, and you’re dropping more onion on the ground than into the pan.
It’s a recipe for frustration and tear-filled eyes (though the onions aren’t helping).
The hack? Do all your chopping at home. In your well-lit, bug-free kitchen, with a stable counter and a sink right there.
Chop your onions, bell peppers, zucchini, carrots, celery—whatever your camp recipes call for.
The benefits are monumental:
• Saves Time: Cooking at camp becomes a breeze. “Sauté some onions” becomes “open bag, dump in pan,” instead of a 15-minute prep ordeal.
• Simplifies Cleanup: This is the big one. No knife to clean. No cutting board to scrub. You’ve just eliminated two of the most annoying camp kitchen cleanup items. You’re welcome.
• Saves Space: A Ziploc bag of pre-chopped onions is about 90% more compact than three whole onions rolling around in your cooler.
Here’s the pro-level move: Don’t just have a “veggie bag.” Label each bag for its specific meal.
For example: “Chicken Veggies & Rice – Day 1” or “Fajita Mix – Day 2.” This takes the organization from “pretty good” to “military precision.” You grab the bag you need, and everything for that dish is right there
4. Eggs in a Water Bottle: A Scrambled Miracle

This is, without a doubt, one of my all-time favorite hacks. I have a deep-seated, genetically-ingrained fear of raw egg contaminating every single item in my cooler.
The thought of a broken egg, its slimy, salmonella-adjacent essence leaking onto my cheese and fruit, haunts my dreams.
The solution is so elegant it makes me want to weep with joy: Crack and scramble your eggs at home, and pour them into a clean, plastic water bottle.
Yes. You read that correctly.
The Method:
1. At home, in your safe, non-judgmental kitchen, crack as many eggs as you think you’ll need into a bowl.
2. Whisk them up like you’re making a standard scramble.
3. Funnel them (or carefully pour them) into an empty water bottle. A 1-liter bottle is perfect for a dozen eggs.
The Benefits Will Blow Your Mind:
• No Breakage Risk: Your eggs are now a unified liquid force. They cannot break. They are invincible.
• Easy Portion Control: Want scrambled eggs for two people but not four? Just squeeze out half the bottle! It’s like a culinary dispenser of joy.
• Zero Mess: The mess happened at home, where you have a sink and 500 sponges. At camp, you just squeeze, cook, and rinse the bottle. That’s it.
Extra Tips for Egg-cellence:
• Omelet Mode: You can even add in some of those pre-chopped veggies, a little cheese, and some salt and pepper right into the bottle. Shake it up, and you’ve got a ready-to-pour omelet-in-waiting.
• For the Over-Easy Purists: I get it. Sometimes you need a sunny-side-up situation. For that, I highly recommend a hard plastic egg carrier, like the one from Coghlan’s. Those things are fortresses. Each egg sits in its own little protective bunker. It’s a game-changer for non-scrambled egg lovers.
5. Frozen Water Bottles: The Soggy Cooler’s Mortal Enemy
Bagged ice is a liar. It promises cold, but what it delivers is a cooler full of cold, soupy water that turns your bread into a spongy tragedy and your egg cartons into papier-mâché.
I’ve lost too many good food items to the Great Melt.
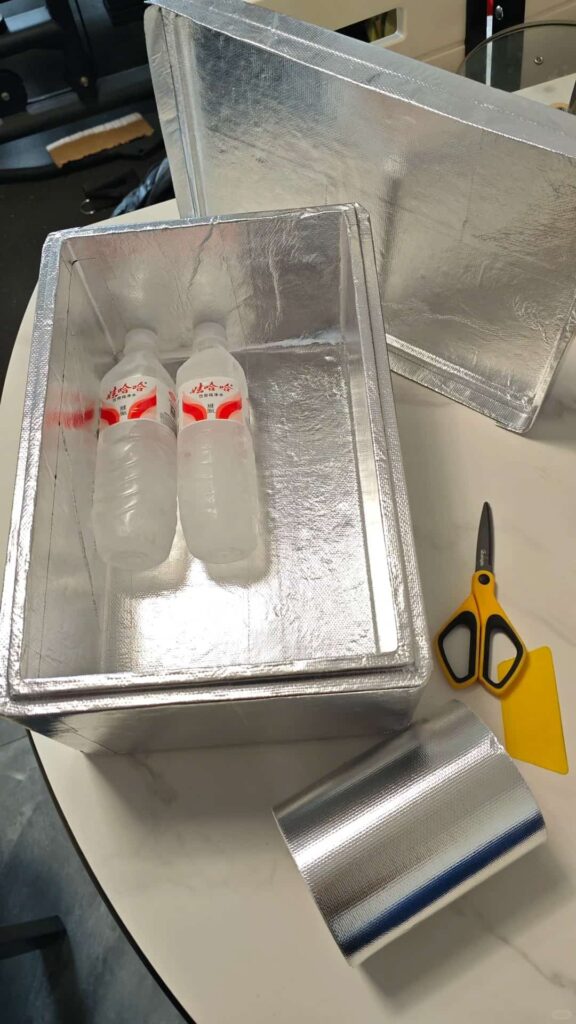
Enter the hero: the frozen water bottle.
This is a staple for any experienced camper. Instead of buying a bag of ice, just freeze several water bottles of various sizes before you leave.
Why this is a superior life form:
• No Soggy Mess: As they melt, the water stays contained inside the bottle. Your food stays high and dry. Your cheese isn’t swimming. Your humanity remains intact.
• Reusable & Flexible: 1-liter bottles are fantastic because you can wedge them into all the nooks and crannies of your cooler. They conform to the space.
• The Big Guns: For a longer trip or a bigger cooler, freeze a gallon jug of water. That thing will stay frozen for days and act as the icy heart of your cooler.
The Best Bonus Benefit: After a day or two, you have ice-cold drinking water ready to go!
Toss a mostly-thawed bottle in your backpack for a hike. It’ll melt gradually, providing you with refreshingly cold water for hours.
It’s hydration and cooling, all in one. Don’t leave home without them. Seriously.
6. Pancake Mix in a Ketchup Bottle: A Stroke of Genius

I love camp pancakes. My family loves camp pancakes. What I do not love is the process of making them.
Hauling out a giant box of mix, a bowl, a whisk, and trying to mix batter without splattering it all over the campsite is a fool’s errand.
It’s a surefire path to a sticky picnic table and a frustrated camp cook.
Behold, the most fun and family-friendly hack in the arsenal: the pancake ketchup bottle.
The Method:
1. At home, mix your pancake batter according to the directions. Don’t be shy.
2. Using a funnel, pour the perfectly mixed batter into a clean, squeezable ketchup or condiment bottle.
You have just revolutionized camp breakfast:
• No Tools Needed: Leave the mixing bowl and whisk at home. You have one single tool: the bottle.
• Mess-Free Transport and Storage: The bottle seals tight. You can toss it in your cooler sideways, and it won’t leak. It’s a self-contained batter vessel.
• Perfect Pancakes Every Time: Squeezing the batter directly onto your cast iron griddle or pan gives you incredible control. Perfect circles, fun shapes for the kids—the sky’s the limit. It’s like being a pancake artist.
I’m not gonna lie, just writing about this is making me hungry.
The thought of those perfect, golden-brown discs, slathered in butter and syrup, with a side of crispy sausage… okay, I need a minute.
This hack is a total game-changer. It’s airtight, the batter stays fresh, and it’s ready for pancake emergencies at a moment’s notice.
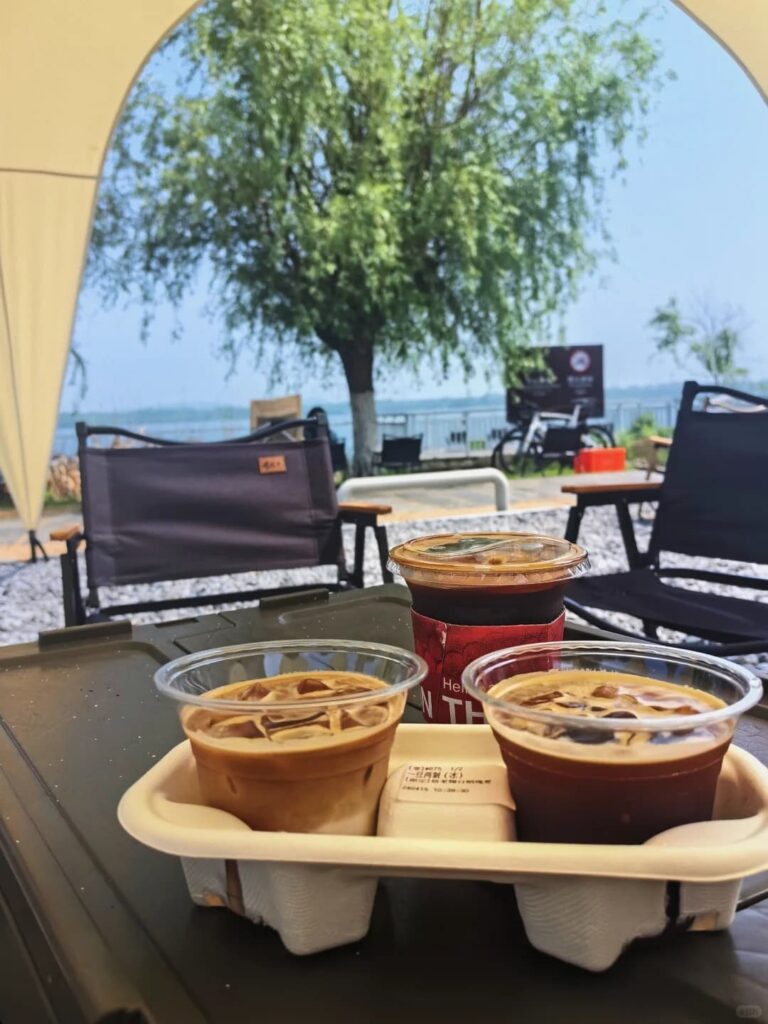
7. Cold Brew Coffee: The Afternoon Savior
Look, I am a firm believer in a piping hot cup of coffee in the morning, brewed over a campfire or a little camp stove. It’s a ritual. It’s non-negotiable.
But what about when the afternoon slump hits? The sun is beating down, you’ve just finished a hike, and the thought of firing up a stove to brew a hot drink is about as appealing as putting on wet socks.
This is where cold brew coffee comes in, my friend.
The Method is Stupidly Simple:
1. The day before you leave, brew your coffee at home using whatever method you prefer—French press, drip, I don’t care. Just make it a little stronger than usual.
2. Let it cool down, then pour it into a glass jar or, even better, an insulated bottle like a Yeti.
3. Stick it in the fridge overnight, and then plop it right into your beautifully packed, reverse-ordered cooler in the morning.
The Benefit: You now have a refreshing, cold, caffeine fix waiting for you when you need it most.
It’s easy and quick—no brewing setup needed at camp. Just pour it over some ice (from your frozen water bottles, of course) or drink it straight from the bottle like the exhausted, nature-appreciating champion you are.
Nothing beats hot coffee in the morning, but a cold one in the afternoon? It just hits different. It’s the taste of victory over the afternoon slump.
8. Bring Your Cast Iron to the Table: The Lazy (and Smart) Person’s Serving Platter

I used to be a plate-and-serve kind of guy. I’d cook a magnificent breakfast of bacon, eggs, and hash browns in my trusty cast iron skillet, and then I’d painstakingly divvy it all up onto individual plates.
By the time I sat down with my own plate, the first person served would already be complaining that their food was cold.
Then, I had an epiphany at Dogwood Campground. I was just so… tired.
So, I plopped the entire, sizzling cast iron pan right in the middle of the picnic table and said, “Family style. Help yourselves.”
It was a revelation.
The Benefits are Obvious:
• Food Stays Warmer, Longer: That cast iron holds heat for an absurdly long time. Your food is still hot and sizzling minutes after you’ve taken it off the fire. This is a godsend on cold mornings or during chilly months.
• Fewer Dishes to Wash: You’ve just eliminated every single serving plate. You cooked in it, you served in it. You now have one less thing to scrub with your eco-friendly camp soap.
!!!SAFETY REMINDER!!! This is non-negotiable. CAST IRON GETS EXTREMELY, TERRIFYINGLY HOT.
You must use a heavy-duty oven mitt, a dedicated cast iron handle cover, or fire-safe gloves when moving the pan to the table.
And announce its presence to your tablemates like it’s a radioactive object. “HOT PAN. DO NOT TOUCH. SERIOUSLY.”
9. Aluminum Foil Popcorn: The Campfire Movie Night
You’re sitting around the campfire, bellies full from dinner, but you’re craving a little snack. Something salty, something fun. Behold: aluminum foil popcorn.
It’s a magical, easy, and highly entertaining campfire snack.
The Method:
1. Tear off a generous sheet of heavy-duty aluminum foil.
2. Pour a tablespoon of oil and about 1/4 to 1/3 cup of popcorn kernels into the center.
3. Bring the edges of the foil together and fold them over to create a sealed, but loosely domed, packet. You need to give those kernels room to pop and do their thing! Imagine a little foil UFO.
4. Using long tongs or sticks, place the packet directly on some hot campfire coals or on a grill over the fire.
The Tips:
• Listen for the Music: You’ll hear the kernels start to sizzle, and then the joyous, rapid-fire pop-pop-pop of success.
• Shake Gently: Give the packet a little shake every now and then to keep the kernels moving and prevent burning.
• It Takes Practice: Heat varies, so your first batch might be a little scorched or have a few un-popped kernels. Don’t give up! It’s a learning process.
Alternative Method (The Soda Can): You can also use an empty soda or beer can.
Add kernels and oil, place it directly on the fire, and wait for the pops. Once it’s done, you have to carefully cut the can open.
It works, but it’s a bit more… dramatic.
For my money, the aluminum foil method is the winner. It’s better for larger batches, it’s easier to share, and there’s something primal and fun about making popcorn right in the fire.
It’s a perfect group snack.
10. Travel-Size Spices & Condiments: Flavor, Minified

You can’t live on salt and pepper alone. Well, you can, but it’s a sad, bland existence. Bringing flavor to your camp kitchen is essential, but you don’t need to haul your entire 12-jar spice rack from Costco.
We’ll break this down into two sections: Spices and Condiments.
Spices: The Pill Dispenser of Flavor
Go to the travel section of any store and buy one of those weekly pill dispensers. You know, the ones with little compartments labeled S-M-T-W-T-F-S.
You are no longer using this for pills. You are now a flavor alchemist.
• Label each compartment with a small piece of tape: Salt, Pepper, Garlic Powder, Paprika, Chili Flake, Cumin, etc.
• It’s incredibly compact and efficient. No more bulky glass jars.
• Alternative for the Truly Thrifty: Reuse Tic Tac containers! They hold a surprising amount and are super durable.
This one little hack saves a ridiculous amount of space and ensures your camp food is never, ever bland.
Condiments: The Squeeze-Bottle Salvation
Ketchup, mustard, mayo—the holy trinity of burger night. But who wants to bring a giant bottle of ketchup that takes up 20% of your cooler?
Option A: The Reusable Squeeze Bottle. Buy a set of small, travel-sized squeeze bottles. Label them with tape. Fill them with your condiments of choice. They’re small, clean, and efficient.
Option B: The Packet Stash (The Backpacker’s Best Friend). This is my personal favorite for lightweight trips. Start hoarding those condiment packets you get from fast-food joints and take-out places.
Ketchup, mayo, hot sauce, ranch, soy sauce, duck sauce—collect them all! Keep a dedicated Ziploc bag in your pantry full of these flavor saviors. When it’s time to camp, just grab the bag.
It’s ultralight, it requires zero cooler space, and when you’re done, you just crush the packet and pack it out.
Adjust the size of your stash depending on your group. A solo camper needs a sandwich bag; a family needs a gallon bag. It’s the ultimate in efficient, packable flavor.
Conclusion: Go Forth and Cook Without Weeping
And there you have it! My 10 favorite camping food hacks, born from years of experience, failure, and triumphant success.
From the reverse-packed cooler to the ketchup-bottle pancakes, each one of these tricks has been picked up over time to make camp cooking easier, tastier, and infinitely less stressful.
These hacks mean you spend less time wrestling with food prep and cleanup, and more time doing what you actually went camping to do: relaxing, exploring, and making memories around the fire that don’t involve scrubbing a greasy bowl.
Now, you might be looking at this list thinking, “Wow, this person is extra.” And you know what? You’re not wrong.
But I’d rather be extra and eating a hot, delicious, organized meal in the woods than be “chill” and eating a cold, sad hot dog while standing in a puddle of melted ice water.