I am the person who, on my first solo camping trip, tried to impress a squirrel with my knife-throwing skills and ended up having a very serious, one-sided conversation with a park ranger about “appropriate campsite activities.”
It was in this spirit of hard-earned, mistake-fueled wisdom that I set out to learn bushcraft first aid.
Not the kind with fancy kits and satellite beacons (though, for the love of all that is holy, bring those too), but the MacGyver-level, “oh-crap-I’m-out-of-gauze” kind.
So, strap in, or should I say, paracord-in. Here are 15 practical, improvised, and field-tested first aid hacks.
They’re the things you hope you’ll never need, but will be pathetically grateful for when you’re three miles from the trailhead and your clumsiness decides to stage a comeback tour.
Table of Contents
1. The Humble T-Shirt
We’ve all been there. You packed three “just in case” shirts but somehow forgot the actual first aid kit.
Suddenly, that graphic tee with the ironic pun doesn’t seem so ironic.
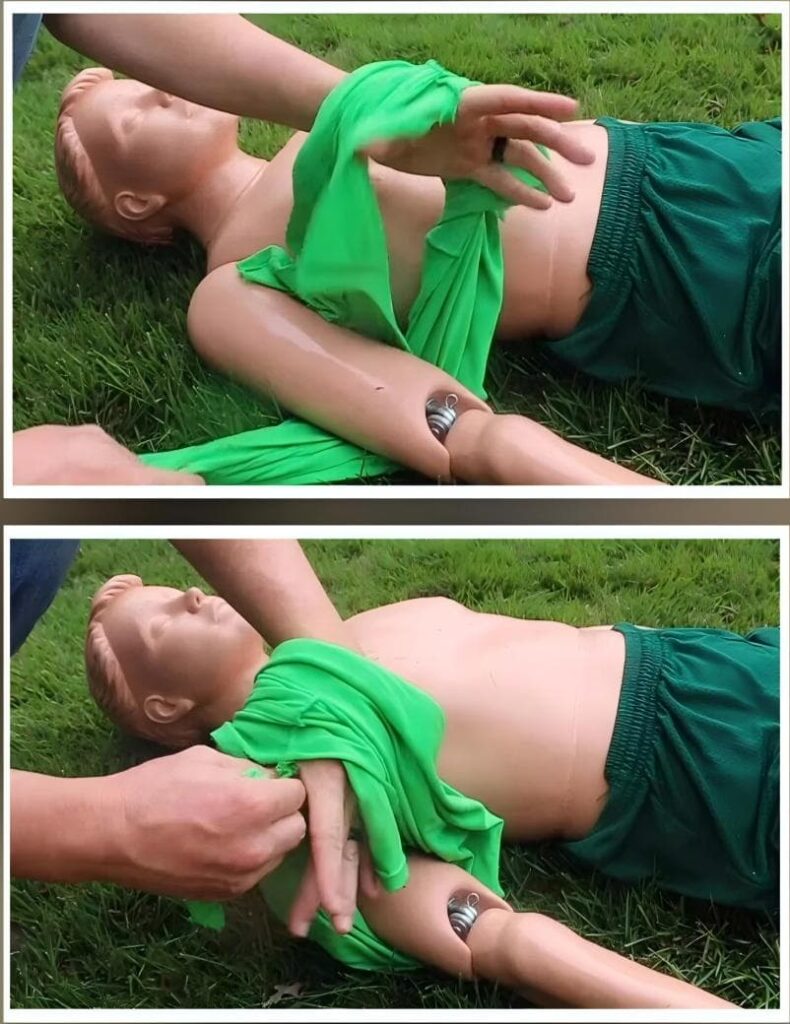
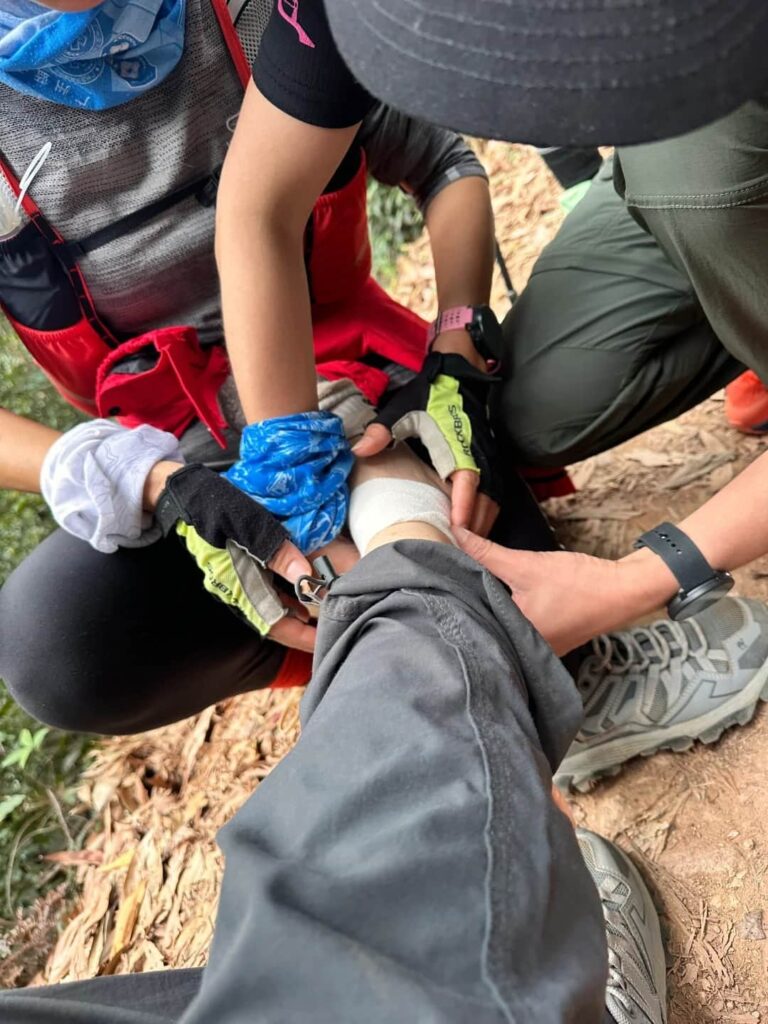
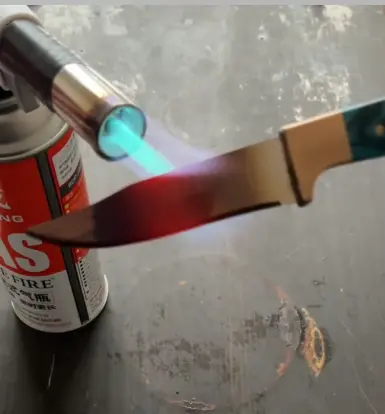
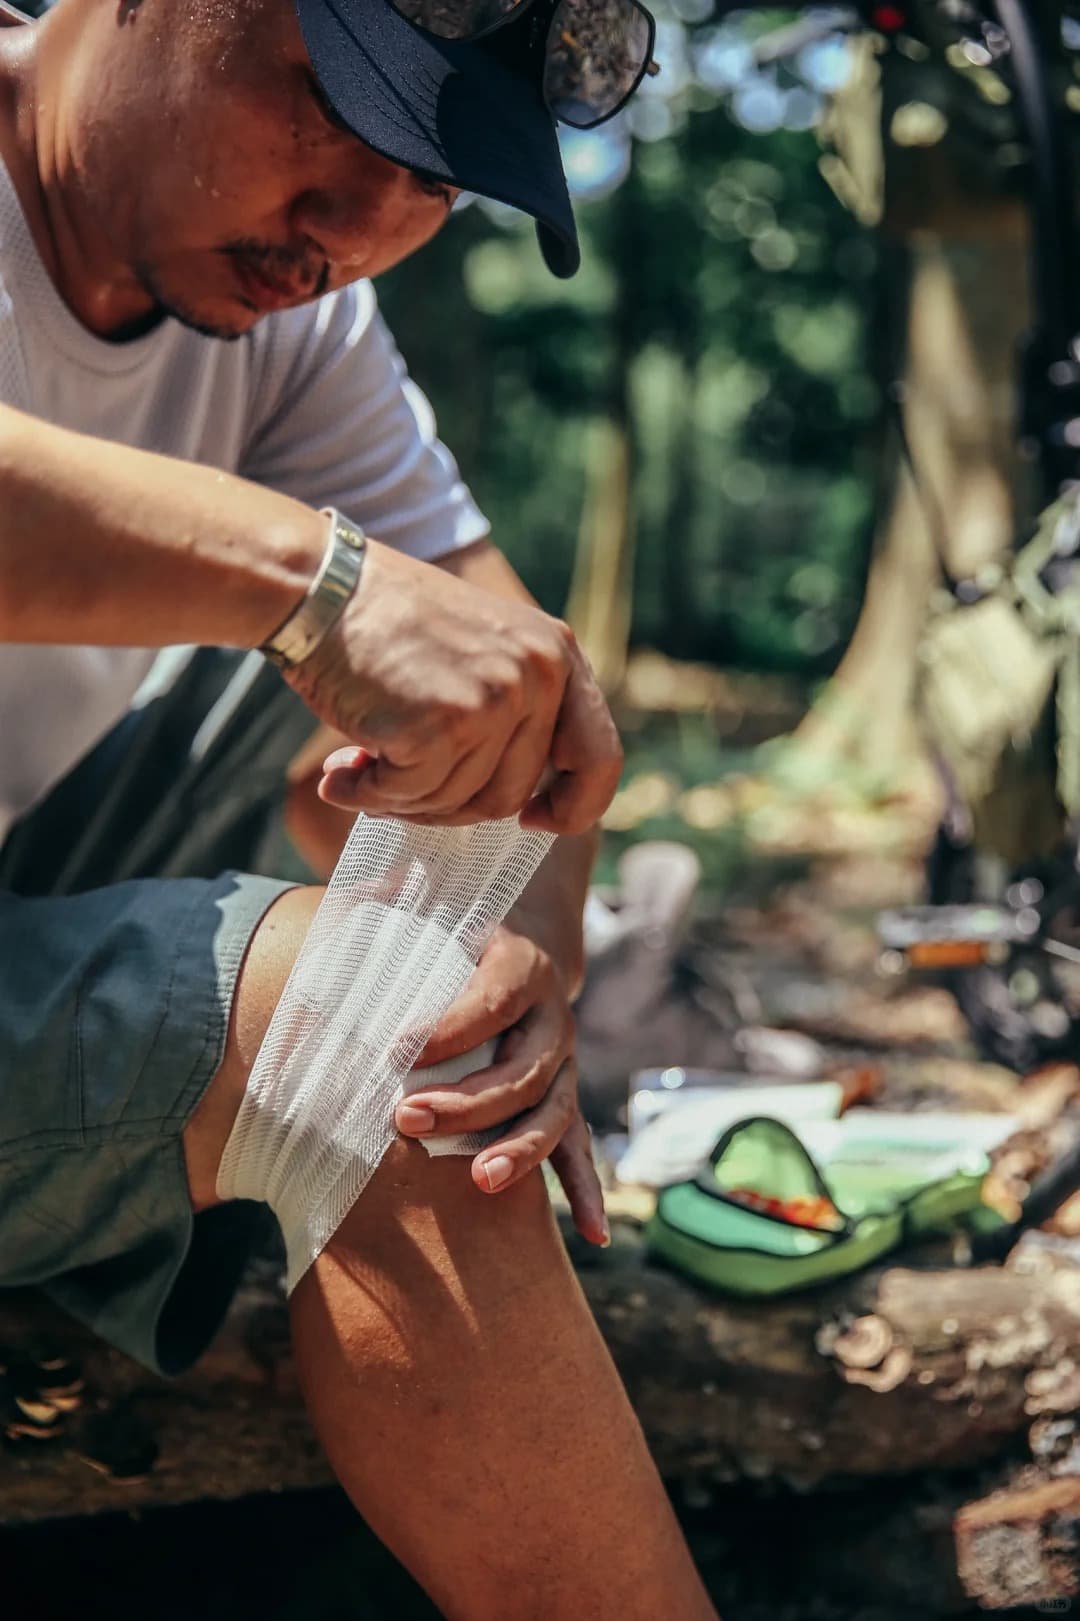
The Hack: If you’re dealing with a bleeding wound, direct pressure is your best friend. Don’t just wad up the whole shirt and hope.
Use your knife or a sharp rock to cut or tear it into long strips. Fold one strip into a thick, absorbent pad.
Press it firmly directly onto the wound. Use the other strips to bind it in place, tying it tight enough to hold pressure, but not so tight you cut off circulation (unless it’s arterial bleeding, which is a whole other, terrifying scenario).
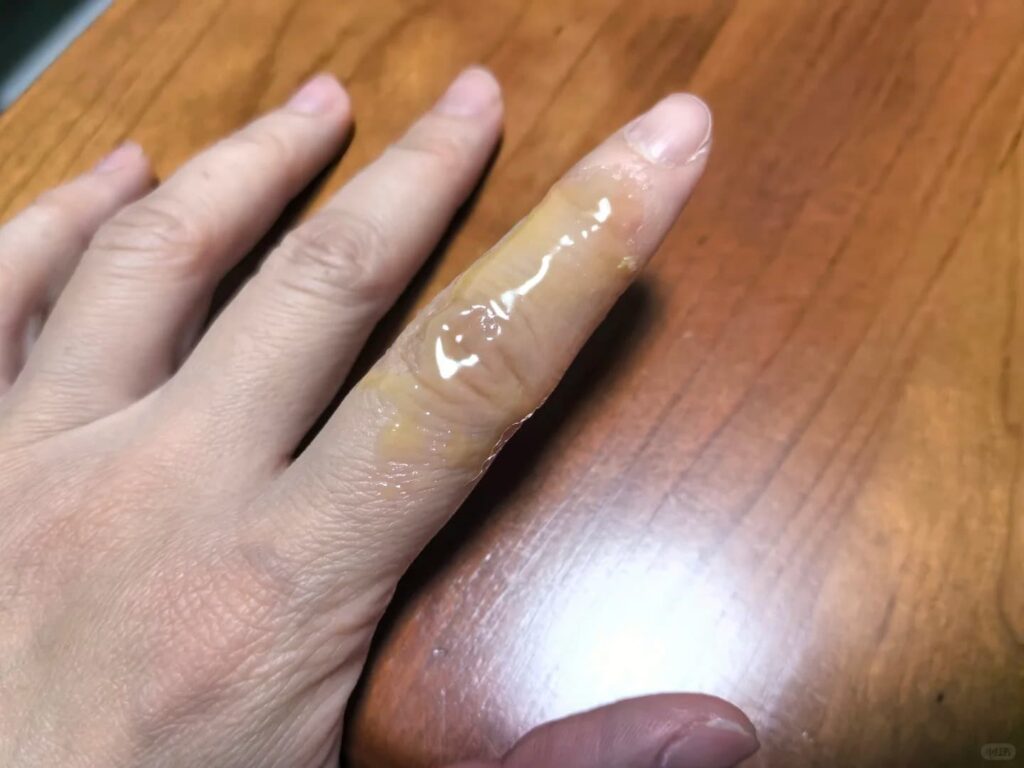
My Personal Experience: I once used a sock. It was clean(ish). The cut was on my shin.
For the rest of that trip, I had a very stylish, slightly crusty anklet reminding me of my folly.
A t-shirt is a far more dignified choice.
2. Duct Tape
If you go into the woods without duct tape, are you even really trying? This silvery miracle is more than just for fixing tent poles and hemlines.
The Hack: For a small cut or a blossoming blister, clean the area as best you can (more on that later).
Place a clean piece of cloth, a folded leaf, or even a bit of your now-redundant gauze-less first aid manual over it.
Then, carefully wrap a strip of duct tape over the top, sealing the edges. It’s waterproof, surprisingly breathable in small amounts, and holds like a dream.
Just don’t use it directly on the wound or hairy skin. The phrase “waxing by wilderness mishap” is not a fun one.
3. The Shemagh/Bandana Sling
You bought that shemagh because it made you look like a seasoned desert explorer. Now, it’s going to make you look like a seasoned desert explorer with a busted arm.
The Hack: Spread the shemagh or large bandana into a triangle. Slide one end under the injured arm, with the point of the triangle pointing toward the elbow.
Bring the top end up over the shoulder on the injured side. Tie the two ends together behind the neck.
Gently fold the point of the triangle up over the elbow and pin or tuck it in. Voilà!
Your arm is now immobilized against your chest, and you’ve maintained 100% of your adventure-cred.
4. Stick ‘Em Up
You took a tumble, and now your ankle looks like it’s trying to grow its own avocado. Time to channel your inner orthopedist.
The Hack: Find two straight, sturdy sticks longer than the injured limb segment. Place one on each side of the limb.
Now, using whatever you have—paracord, shoelaces, strips from that sacrificial t-shirt—gently bind the sticks in place.
Key words: Gently. You’re providing stability, not making a log bundle. Tie above and below the injury.
The goal is to prevent movement, not to cut off the blood supply with the grim finality of a tourniquet.
5. Pine Sap
Forget the first aid kit; follow your nose to the sticky, aromatic pine tree. Pine sap (resin) has been used for centuries as a sealant and antiseptic.
The Hack: Find some golden, hardened sap on a tree trunk. Scrape it off with your knife and warm it slightly near (not in!) your fire until it’s pliable.
Let it cool for a second so you don’t give yourself a third-degree burn on top of your cut. Dab a small amount onto a clean cut. It will harden, forming a protective barrier. It’s not a substitute for proper cleaning or stitches for a major wound, but for that “I-argued-with-my-knife-and-lost” slice on your thumb, it’s a forest pharmacy in a glob.
6. Activated Charcoal
You ate the “interesting” berries. Or the fish tasted… philosophical. Now your stomach is staging a revolt.
The Hack: If you have hardwood (like oak or maple) from your fire, you can make a crude charcoal.
Burn a piece completely, let it cool, and grind it into a powder between clean stones. Mix a tablespoon of this powder with water and drink it.
The charcoal can bind to some toxins and help move them through your system.
THIS IS FOR MILD, FOOD-RELATED ISSUES ONLY. IT IS NOT A CURE FOR POISONING. IF YOU’RE SERIOUSLY ILL, GET HELP.
Also, it will turn your mouth and everything else a delightful shade of post-apocalyptic black. You have been warned.
7. Hot Stone Therapy
You’ve canoed for eight hours. Your shoulders feel like they’re made of ground glass and regret. Enter: the river rock spa.
The Hack: Select smooth, dense river stones (wet ones can explode, so avoid porous, soggy ones). Heat them in the edge of your fire for 10-15 minutes.
Using sticks or leather gloves, wrap them thoroughly in a cloth, shirt, or your spare socks.
Apply these warm (NOT scalding hot) bundles to aching muscles or cramping areas.
It’s primal, it’s effective, and it’s way cheaper than a massage.
8. The Instant Ice Pack
That graceful fall you took off the log? Your ankle is now auditioning for the role of a grapefruit.
The Hack: Reduce swelling and pain with a cold compress. If there’s snow, pack a bunch into a bandana or shirt and wrap it around the injury.
No snow? Soak a cloth in a cold stream and apply it. 20 minutes on, 20 minutes off.
It’s simple, but it works wonders to slow the internal carnival of swelling and bruising.
9. Sterilization
You need to dig out a splinter or remove a tick. Your multi-tool tweezers have been in the dirt. This is a microbiology experiment you don’t want to run.
The Hack: Hold the metal part of your knife blade, tweezers, or needle in the flame of your fire for a full minute.
Let it cool completely. Alternatively, if you have a pot, boil them in water for 5-10 minutes.
Congrats, you’ve just dramatically reduced the chance of turning a minor annoyance into a major infection. You are now both medic and autoclave.
10. Honey
You packed a little honey for your tea. Turns out, it’s also for your epidermis.
The Hack: Honey is hygroscopic (it draws moisture out) and naturally antibacterial. For a minor abrasion or burn, after cleaning, apply a thin layer of clean honey and cover it with a bandage (or your duct tape/cloth combo).
It can help keep the wound moist and inhibit bacterial growth. Just make sure it’s real honey, not “honey-flavored syrup.”
The bees worked hard for this medicine.
11. The Tourniquet
This is the big one. The “break glass in case of emergency” procedure. We’re talking severe, life-threatening arterial bleeding—bright red blood pumping out in rhythm.
The Hack: A belt, a strip of strong cloth, a bandana. Place it 2-3 inches above the wound (closer to the torso), not on a joint.
Wrap it around and tie a simple overhand knot. Place a stick, tent peg, or sturdy utensil on top of the knot. Tie another knot over the stick.
Now, twist. Twist until the bleeding stops or slows to a trickle. Secure the stick so it doesn’t unwind.
WRITE DOWN THE TIME YOU APPLIED IT. This is crucial for medical personnel. A tourniquet left on too long risks losing the limb, but it saves lives.
Know how to do it, but pray you never, ever have to.
12. Birch Bark Bandaging
The papery white bark of a birch tree isn’t just great for starting fires.
The Hack: Carefully peel a piece of bark (from a fallen tree or with permission/practice from a live one).
It’s flexible, waterproof, and moldable. You can shape it into a curved “splint” or a protective cover to go over a wrapped wound on a knee or elbow, shielding it from dirt, rain, and further bumps.
It’s nature’s own sterile(ish) packaging.
13. The Precision Eye Wash
Dust, ash, or a rogue bug has decided your eyeball is its new home. Rubbing it will only make things worse, like a gritty, painful snow globe.
The Hack: Take your water bottle. With your knife point, carefully poke a tiny, tiny hole in the center of the plastic cap.
Fill the bottle with clean, potable water. Squeeze the bottle while holding your eye open. The small hole will create a gentle, targeted stream to flush out the debris.
It’s far more controlled than trying to pour from the bottle or, heaven forbid, using questionable stream water directly.
14. Finger Splints
You jammed your finger catching a falling pot, or worse, a falling ego.
The Hack: Find a small, straight twig about the length of your finger. Use your knife to shape it. Hold it near the fire to “fire-harden” it—this drives out moisture and makes it stronger and more sterile.
Let it cool. Tape or bind it to the injured finger to keep it straight and stable.
You’ll look like you’re pointing accusingly at nature for the rest of the trip, but you’ll heal straighter.
15. Butterfly Closures
You have a cut that’s a little too wide to just bandage. It needs to be pulled together.
The Hack: Take a strip of medical tape or, you guessed it, duct tape. Cut it into a thin strip, about an inch long.
Now, instead of placing it straight across, fold the ends back on themselves, sticky-to-sticky, so you have a non-sticky “bridge” in the middle.
Place this bridge over the cut so the sticky ends on either side pull the skin edges together. Use several in a row.
They’re not as strong as stitches, but they help minimize scarring and promote cleaner healing.
Final Thoughts
The goal of bushcraft isn’t to see how much you can suffer, but to see how comfortably and safely you can thrive with less.
These skills are about adding another layer of resilience to your adventure, not replacing the fundamentals.


