
Look, I get it. In a world where your phone can tell you how many calories are in a single blueberry, the idea of using a compass feels about as modern as churning your own butter.
It’s a relic, a thing you see in museum displays next to a butter churn, labeled “Old-Timey Direction-Finder.”
But here’s the cold, hard, and slightly damp truth: your phone is a fragile, glass-covered diva that will abandon you the moment its battery gets a little chilly or it can’t see a cell tower.
A compass, on the other hand, is a stubborn, unimpressible piece of genius that will point north even during the zombie apocalypse, provided the zombies haven’t messed with the Earth’s magnetic field.
Most people have no idea how this works, but understanding it opens up the backcountry and can possibly save your life.
The good news? It’s not rocket science. At its heart, a compass is just a magnet on a pin, having a existential crisis, forever pointing towards its one true love: Magnetic North.
Our job is to gently guide this emotionally needy arrow to help us get where we want to go.
So, grab your sense of adventure and let’s demystify this thing. The purpose of this guide is to teach you land navigation in the simplest terms possible.
Table of Contents
The Gear: Or, What You Need to Not Get Lost
1. The Compass
You need a real compass. Not the free one that came in a cereal box in 1997, and not the app on your phone that you just closed to read this.
You need a proper baseplate compass. This is the kind with a clear, rectangular plastic base with a spinning dial inside.
- Why this kind? Because the straight edges are crucial for drawing lines on your map, and the clear base lets you see the map underneath. It’s like a see-through, direction-finding ruler.
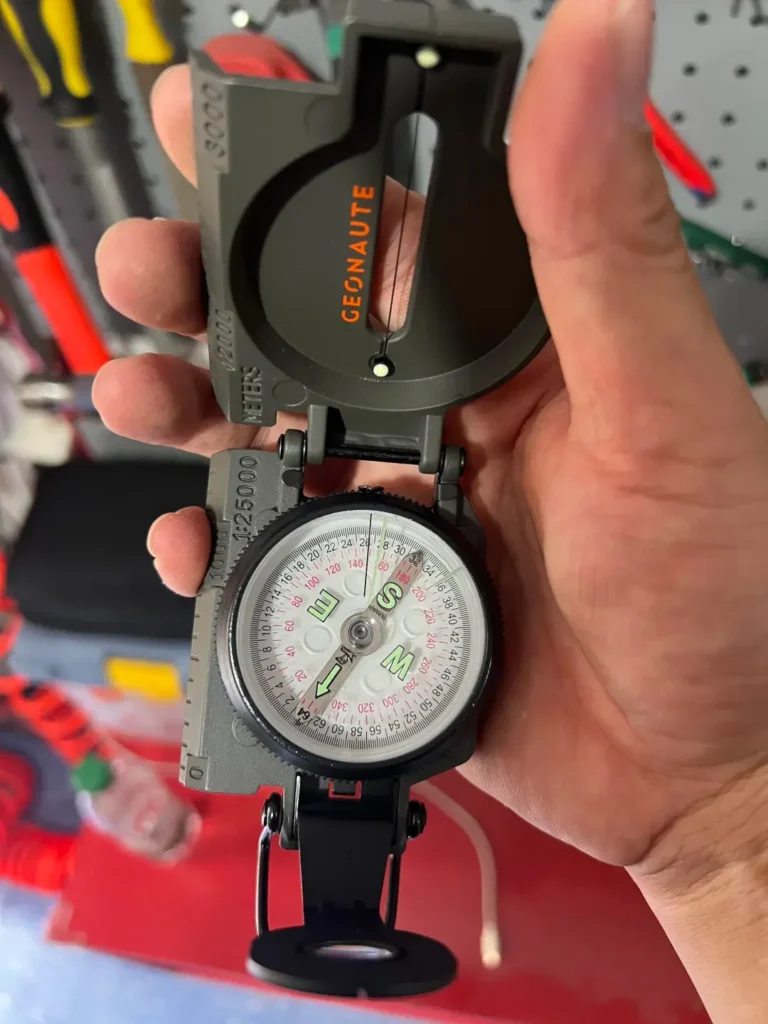
- Alternatives: If you’re feeling extra tactical, you can opt for something like a Lensatic compass (think military style). They’re incredibly accurate and durable, but for our purposes, they’re like using a Formula 1 car to go to the grocery store. A baseplate compass is the trusty, dependable family sedan of navigation—it gets the job done without unnecessary complexity.
2. The Map
This might seem obvious, but it bears shouting: YOU NEED A MAP OF THE AREA YOU ARE IN. A compass without a map is like having a car without headlights.
You can move, but you have no idea what’s around you, and you’re probably going to end up in a ditch.
Get a topographic map (“topo map”). These are the ones with all the squiggly lines that look like a cardiograph of a hyperactive earthworm.
Those lines tell you about the shape of the land—hills, valleys, and cliffs you’d rather not tumble down.
3. Knowledge of Your Current Location and Destination
This is the “common sense” part that often gets lost in the panic of being lost. You need to have a rough idea of where you are to start.
You don’t need GPS coordinates pinpointed to the millimeter, but you should be able to point to a spot on the map and say, “I am roughly here.”
For example, “I am at the campsite at the trailhead” and “I want to get to the summit of that big, pointy mountain over there.”
Key Note to Burn Into Your Brain: A compass alone cannot tell you where you are. It can only tell you what direction you’re facing or traveling.
It’s a directional tool, not a locational one. Pair it with your map and your eyeballs (looking at landmarks) to achieve true navigation nirvana.
Understanding the Compass: It’s Not You, It’s Magnetic North

Let’s have a quick heart-to-heart with your compass.
Its main purpose in life is hilariously simple: to help you determine the correct direction of travel from Point A (You, Currently Clueless) to Point B (The Place With The Snacks).
Repeat after me: The compass is a directional tool, not a GPS.
It doesn’t care about your destination. It has one job: flirting with magnetic north. Our entire strategy revolves around tricking this single-minded device into giving us the information we need.
The core of everything we’re about to do is making sure the magnetic needle is happy and aligned, which in turn points the rest of our gizmo in the right direction.
Focus on keeping that red arrow (or whatever color your north-seeking arrow is) pointing the right way, and you’ve won half the battle.
The Main Event: Your Step-by-Step Guide to Not Wandering Aimlessly
Alright, enough theory. Let’s get our hands dirty. Find a flat rock, a log, or your friend’s back (with their permission, and maybe a towel) to lay out your map and compass.
We’re going on a hypothetical journey from our campsite to a beautiful lake a few miles away.

Step 1: Draw Your Line
This is the “connect the dots” phase of being an expert navigator.
- Place your map on a flat surface.
- Locate your starting point (Campsite) and your destination (Sparkly Lake of Glory) on the map.
- Take your compass and place it on the map so the long, straight edge of the baseplate forms a line connecting your start point to your destination. It’s crucial that the direction-of-travel arrow (the arrow printed on the baseplate itself) is pointing toward your destination. If you have it backwards, you’re just navigating to the place you’re trying to leave, which is a profound metaphor for something, but a terrible navigation strategy.
You should now have a compass lying on your map with a straight line from start to finish, with the baseplate arrow aimed at your goal.
Congratulations, you’ve just done the cartographical equivalent of drawing a line in the sand.
Step 2: Orient the Map (The "Aha!" Moment)
This is the cool part where everything starts to make sense in the real world. “Orienting” the map simply means turning the entire map so that north on the map is pointing to actual north in the real world.
When you do this, the map becomes a perfect 2D model of the 3D world around you. The trail on the map lines up with the trail under your feet.
The big hill on the map is the big hill you’re looking at. It’s magic.
- Keep the compass baseplate firmly on the map, with your drawn line in place.
- Now, look at the spinning circular dial inside the baseplate (the bezel). You’ll see a bunch of lines on it, called orienting lines. You’ll also see a little outlined arrow on the bezel’s floor, called the orienting arrow.
- Without moving the baseplate, rotate the bezel until the orienting lines and the orienting arrow are parallel to the north-south lines on your map. (Topo maps have these lines, and they all point to True North at the top of the map). Make sure the N on the bezel is pointing to the top of the map (True North).
Your map is now oriented. The compass bezel and the map are locked in a harmonious agreement about where north is. The real world and the paper world are now friends.
Step 3: Read Your Bearing (The Magic Number)
You’ve done the setup. Now for the payoff. The “bearing” is just a fancy word for a direction expressed in degrees.
Think of it as a more precise version of “left” or “kind of that way.”
- Look at the point on the bezel marked by the index line (it’s a little line, often with a tiny arrow, right at the base of the direction-of-travel arrow on the baseplate).
- The number on the bezel that is aligned with this index line is your bearing. Write this number down, etch it onto your soul, or just remember it for the next five minutes.
Understanding the Bearing:
- 0° or 360°: North
- 90°: East
- 180°: South
- 270°: West
So, if your bearing is 38°, you are heading roughly North-Northeast. You don’t need to be this precise; just knowing the number is enough.
The outcome of this step is that you now have a precise, numerical direction of travel. You are no longer a wanderer; you are a navigator with a mission.
Step 4: Follow Your Bearing (The Walking Part)
Now, pick up the compass. You can fold the map up; its main job for the moment is done.
- Hold the compass level in front of you, around your waist or chest.
- Now, the most important mantra in all of compass lore: “Put Red in the Shed.” Rotate your entire body—not just the compass—until the floating magnetic needle (the red one) is perfectly inside the red orienting arrow on the bezel. The “shed” is the orienting arrow. “Red” is the needle. Get red in the shed.
- Once the needle is snug in its shed, look up. The direction-of-travel arrow on the baseplate is now pointing exactly where you need to go. Pick a distinctive landmark in the distance—a peculiarly shaped tree, a big rock, the spot where a cloud looks like a poodle—and walk to it. This is better than staring at your feet and the compass the whole time.
As you walk, keep the compass level and periodically check that you are still keeping “red in the shed.”
If you hit an obstacle, like a boulder field or a pond full of suspiciously friendly frogs, go around it, then return to your original bearing and continue.
Pro-Level Tips (So You Can Look Even Smarter)

Following a Bearing Without a Map
Sometimes, you might just be given a bearing. “The secret waterfall is at 285 degrees from here!” No map needed for this part.
- Set your bezel to the given bearing (285°).
- Hold the compass, and “put red in the shed.”
- Follow the direction-of-travel arrow. Simple as that.
Understanding Declination: The Compass's Dirty Little Secret

Okay, lean in. This is the part that separates the hobbyists from the pros. Remember when I said the map’s north (True North) and the compass’s north (Magnetic North) are best friends?
Well, they’re not identical twins. They’re more like cousins who live in different cities.
The Earth’s magnetic field is a fickle thing, and the Magnetic North Pole is not in the same spot as the Geographic North Pole (the one all the maps use).
The difference between them is called declination.
- True North: The top of your map. The North Pole. The spinny axis of the planet.
- Magnetic North: Where your compass needle points. It’s currently hanging out in northern Canada, and it slowly moves over time.
The amount of error, or declination, varies depending on where you are on Earth.
Your map will tell you what it is (e.g., “Declination: 4.5° E for 2025”). Here’s the crucial part:
- East Declination: Magnetic North is east of True North.
- West Declination: Magnetic North is west of True North.
And here’s the rhyme that will save you: “East is least, West is best.”
This means if you have an East declination, you subtract the number from your map bearing to get your compass bearing. If you have a West declination, you add it.
Let’s do an example. You’re in Austin, TX, where the declination is about 4.5° East.
- Your map work gave you a bearing of 38°.
- Declination is East, so we subtract.
- 38° – 4.5° = 33.5° (let’s round to 34°).
So, while your map says 38°, you must set your compass to 34° and follow that bearing to account for the magnetic pull.
If you don’t, after a few miles, you’ll be hundreds of yards off course. It’s the difference between reaching the lake and reaching the swamp next to the lake.
This is not a trivial detail. It is the secret handshake of competent navigation.
Summary: The TL;DR for the Wilderness
Don’t let the details overwhelm you. It boils down to four simple steps:
a. Draw a line from your start point to your destination on the map.
b. Orient the map by aligning the compass’s orienting lines with the map’s north-south lines.
c. Read the bearing at the index line.
d. Follow the bearing by keeping “red in the shed” as you walk.
An optional, super-pro skill is triangulation—using bearings to two known landmarks to find your exact location on a map when you’re truly lost. But that’s a lesson for another day.
For now, the final, most important tip is to always practice and double-check your bearings.
Trust the process, not your gut feeling. Your gut feeling will tell you the car is “definitely that way.” The compass knows the truth.


