Setting up a campsite is part science, part art, and occasionally part wrestling match with a tent pole that seems personally offended by your existence.
You’ll curse. You’ll sweat. You might even cry a little. But when that tent finally stands tall, you’ll feel like a true wilderness conqueror.
Whether you’re perched on a rocky ridge or nestled in a sandy wash, the quality of your setup determines whether you wake up refreshed or feeling like you’ve been folded into a suitcase and stored in an attic for seventeen years.
Table of Contents
1. Arrive Before the Sun Sets
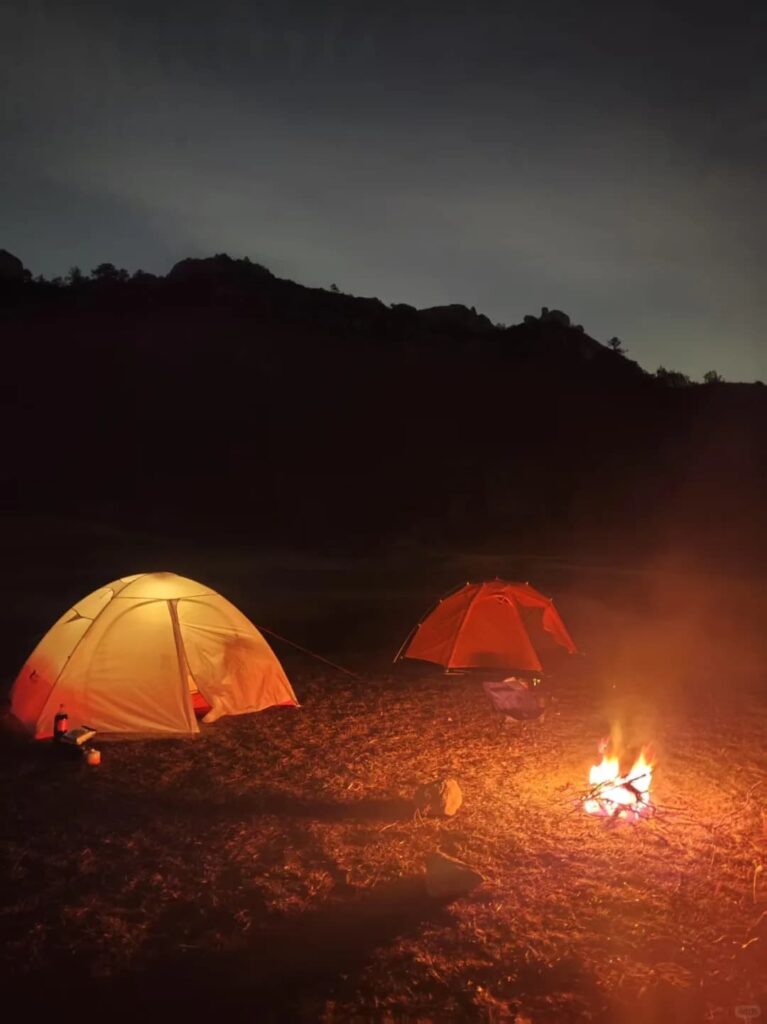
Your eyes aren’t night-vision goggles, despite what you told your friends when you bought that “tactical” flashlight online.
Navigating uneven terrain or spotting hazards like glass, ant hills, or roots is nearly impossible in the dark. Sure, you could set up by headlamp, but then you’ll wake up to discover your tent straddling a small creek or, even worse, directly on top of a ground bee nest.
Trust me, nothing ruins a camping trip quite like discovering at 3 a.m. that you’ve pitched your tent directly on top of a fire ant colony. Those little guys get really cranky when disturbed. They hold grudges. They remember faces. They will coordinate attacks on your ankles with military precision.
Plus, setting up in daylight means you actually get to enjoy the view you came for. Sunsets are pretty. The golden hour makes everything Instagram-worthy. Tripping over your own cooler while muttering creative swear words is less so.
Give yourself at least two hours of daylight before sunset. This buffer lets you explore the area, find the truly flat spots, and make adjustments before darkness turns your campsite into an obstacle course of doom.
2. Evaluate the "Widowmaker" Risk
Always look up before you look down. Seriously. Tilt your head back and stare at the sky like you’re waiting for a message from God or expecting to see a really interesting bird.
What you’re actually looking for is dead branches, unstable trees, or anything that looks like it might fancy a closer look at the ground. Avoid pitching your tent under dead branches or unstable trees that could fall in a gust of wind. They call them “widowmakers” for a reason, and it’s not because they’re excellent at knitting.
Look for the telltale signs: branches without leaves when everything else is green, cracks in the trunk, fungus growing on the bark, or trees that lean at an angle that suggests they’ve been thinking about lying down for a while. A falling branch doesn’t care how expensive your sleeping bag was. It just wants to ruin your night and possibly your face.
Also, check for “snags”—standing dead trees that could topple in high wind. And watch for what foresters call “hangers”—broken branches stuck up in the canopy, just waiting for the right breeze to drop them on your unsuspecting head.
3. Find the High Ground
Water flows downhill. This isn’t complicated physics. Yet every year, campers wake up floating because they thought that lovely grassy depression looked perfect for a tent.
Even on flat terrain, identify the micro-elevations. Look for the subtle rises in the landscape. Walk around your potential site and feel for changes underfoot. That slight bump might save your sleeping bag from becoming a sponge.
Avoid depressions or “bowls” where water will pool if a flash rainstorm hits. Your tent is not a boat. It doesn’t have oars. It doesn’t float. It has a floor that, while waterproof, wasn’t designed for submersion.
Here’s a pro tip: if the area has dark, rich soil or water-loving plants like moss, cattails, or reeds, it’s probably wet at least part of the year. Don’t learn this lesson the wet way. Nothing dries out a camping enthusiasm quite like waking up in a puddle at 3 a.m. and realizing your sleeping bag now weighs approximately forty-seven pounds.
4. Master the "Gentle Slope" Rule
Sometimes perfect level ground just doesn’t exist. Maybe you’re on a mountainside. Maybe the site is slightly tilted. Maybe the campsite gods are testing your commitment to outdoor recreation.
Whatever the reason, you’ve got options that don’t involve rolling downhill all night like a very tired log. If the ground isn’t perfectly level, sleep with your head at the uphill end. This prevents blood from rushing to your head and waking up with a headache that makes you question every life choice that led you here.
Your body will thank you. Your brain needs blood, but not all of it at once. Think of it like a water balloon—you want even distribution, not all the water sloshing to one end.
For slopes that are steeper than you’d like but still workable, consider sleeping perpendicular to the incline rather than parallel to it. This creates less of a head-to-toe angle and more of a side-to-side tilt that’s easier to ignore. Your sleeping pad will also thank you for not sliding off into the night.
5. Clear the Footprint, Don't Dig
That rock digging into your kidney? Move it. That pinecone trying to impersonate a medieval torture device? Toss it. That stick that’s pointing directly at where your spine will be? Relocate it with prejudice.
Remove loose rocks and pinecones from your tent site. Run your hands over the ground. Feel for lumps. Your future self, lying awake at 2 a.m., will appreciate this attention to detail.
But here’s where beginners go wrong. They grab a shovel and start trenching. Avoid “trenching”—digging holes around your tent. This damages the ecosystem and is generally unnecessary with modern gear. Your fancy tent already has a waterproof floor. You don’t need a moat.
Leave the landscaping to professionals. Those little channels you dig will erode in the rain, damage plant roots, and generally make Leave No Trace enthusiasts weep into their reusable water bottles. Plus, trenching is actually illegal in many national parks and forests. Nobody wants a citation for unauthorized earthmoving.
6. Use a Footprint or Tarp
Your tent floor is tough, but it’s not invincible. It’s not made of adamantium, despite what the marketing copy suggested. Rocks, sticks, and rough ground will eventually wear through even the best materials.
That’s where footprints come in. Protect your tent floor from abrasions and moisture by using a ground cloth. You can buy one specifically made for your tent, or you can use a generic tarp cut to size. Both work. Both save your tent’s floor from an early grave.
Here’s the pro tip: tuck it slightly inside the perimeter of the tent. Why? Because if the tarp sticks out, rain will hit it and channel right underneath your tent. Congratulations. You’ve just created an indoor swimming pool with free tent accommodations.
Don’t be that person. Tuck that tarp in like you’re making a very large, very awkward bed. Your sleeping bag will stay dry. Your sanity will remain intact.
7. Orient for the Wind
Wind is sneaky. It starts as a gentle breeze, rustling leaves and making you feel poetic and connected to nature. Then 2 a.m. arrives and suddenly your tent sounds like it’s trying to achieve liftoff and possibly join the International Space Station.
Point the smallest profile of your tent into the prevailing wind. Think of your tent like a ship. You want to cut through the wind, not catch it like a sail heading for adventure. This reduces noise and prevents the poles from buckling under pressure.
How do you figure out wind direction? Look at the trees. See which way they’re leaning permanently. Check for wind-shaped vegetation. Feel the breeze on your face. Watch which way your campfire smoke drifts.
Nobody wants to hear “SNAP” in the middle of the night. Unless it’s breakfast. Breakfast snaps are fine. Tent pole snaps require 3 a.m. repair sessions with duct tape and creative swearing.
8. Adapt Your Stakes to the Soil
Not all dirt is created equal. That’s a profound statement about life, but also about tent stakes. Using the wrong stake in the wrong soil is like bringing a knife to a gunfight. You’ll lose, and you’ll lose spectacularly.
Use long, thin stakes for hard-packed dirt. They slide in easier and grip better because of their reduced surface area. Think of them as precision instruments for stubborn ground.
Use wide “snow/sand” anchors for soft ground. These spread the load and actually stay put rather than pulling through like a needle through loose fabric. Some look like tiny plastic snowshoes for your tent. They’re adorable and functional.
Use heavy-duty steel stakes for rocky areas. Because sometimes you need to convince the ground who’s boss through sheer, stubborn force. These won’t bend when they hit rocks. Your tent will stay put. Your sanity will thank you.
And carry a multi-tool or small hammer. Your hiking boot works in a pinch, but nothing beats proper leverage for those stakes that refuse to cooperate with reality.
9. The "Big Rock" Anchor Method
Sometimes the ground just says “no.” Maybe you’re on solid rock. Maybe the soil is so thin that stakes just bounce off and laugh at you with the mocking energy of a teenager asked to do chores.
On solid rock where stakes can’t penetrate, tie your guy lines to heavy boulders. This is called the “deadman” anchor method, and it’s been keeping tents in place since before tents had floors.
Find the biggest rock you can barely move. Tie off to it. That rock isn’t going anywhere. It’s been sitting there for millions of years. A little wind won’t change that. If rocks are scarce, use logs. If logs are scarce, fill stuff sacks with dirt and use those.
For extra security on really exposed sites, tie multiple rocks together. Create a rock daisy chain. Your tent will survive anything short of a direct hurricane hit. And if a hurricane hits, honestly, you have bigger problems than guy line placement.
10. Establish a "Kitchen" Radius
Bears have excellent noses. So do raccoons, squirrels, and that one campground raccoon who’s basically a furry ninja with opposable thumbs and a personal vendetta against coolers.
Set up your cooking and food storage area at least 200 feet away from your sleeping area. This keeps curious wildlife away from your tent. You don’t want a bear sniffing your face at midnight because you made bacon for dinner and then slept in bacon-scented pajamas.
Separate kitchen from bedroom. It’s not just for apartments anymore. This distance also keeps cooking smells out of your sleeping gear and prevents crumbs from inviting tiny visitors into your tent.
Store all food, toothpaste, deodorant, and anything else with a scent in bear-proof containers or hung properly. Yes, that includes your chapstick. Yes, that includes the granola bar wrapper in your pocket. Animals don’t distinguish between “food” and “things that touched food.” To them, it’s all delicious.
11. Maximize Ventilation
Cold air feels like the enemy when you’re camping. Your instinct says “close everything, trap the warmth, survive until dawn.” But here’s the paradox: closing every vent actually makes things worse.
Even in the cold, keep vents open. Your body releases moisture all night. You breathe it out. You sweat it out. That moisture has to go somewhere. In high-humidity or damp terrain, internal condensation can make your sleeping bag wetter than the rain would.
A wet sleeping bag is a cold sleeping bag. And a cold sleeping bag means a very, very long night spent wondering why you didn’t just book a hotel like your friends suggested.
Most modern tents have venting options for exactly this reason. Use them. Open the vents at the top. Leave the doors slightly ajar if the bug screens allow. Create airflow. Your future self, dry and warm, will send thanks back through time.
12. Create a "Mud Room"
Dirt happens. It’s not personal. It’s just the nature of being outside. You walk around the campsite. Your shoes collect debris. Then you try to enter your tent and suddenly everything’s gritty and you’re questioning every decision that led to this moment.
Place a small packable mat or even your car’s floor mat outside the tent door. This simple trick keeps grit and mud from entering your sleeping space. Your sleeping bag will stay cleaner. Your sanity will stay intact.
Nobody likes crunchy socks at 4 a.m. Nobody enjoys finding pine needles in their underwear. A $5 doormat from a discount store solves both problems.
Inside the tent, designate a specific corner for dirty gear. Keep your sleeping bag away from the entrance. Create a routine: shoes off, wipe feet, enter. Your tent will thank you with years of faithful service.
13. Insulate from the Bottom Up
Cold ground is a heat thief. It will steal your warmth without asking permission. It doesn’t care about your feelings or your expensive down sleeping bag that cost more than your first car.
On cold or frozen ground, your sleeping pad is more important than your bag. Use a high R-value pad to prevent the ground from sucking the heat out of your body. Think of the pad as a barrier between you and the earth’s icy indifference.
Sleeping bags keep you warm from the top. Pads keep you warm from the bottom. Both matter. The pad matters more. Without proper ground insulation, even the world’s best sleeping bag won’t save you from frozen misery.
For extreme cold, layer pads. Put a closed-cell foam pad under an inflatable pad. The foam provides fail-safe insulation even if the inflatable fails. Plus, foam pads cost less than therapy for cold-induced camping trauma.
14. Use Reflective Guy Lines
Tripping is funny in movies. In real life, face-planting at 2 a.m. because you couldn’t see a tent line is less hilarious. Your pride hurts. Your knees hurt. Everyone within earshot now knows you’re the person who can’t navigate their own campsite.
In tight or rugged campsites, use reflective cordage or flagging tape. This simple addition means you won’t trip over your own gear during a midnight bathroom run. Your ankles will thank you. Your dignity will also appreciate not being sprawled on the ground in your long underwear.
Wrap reflective tape around stakes. Attach small glow-in-the-dark clips to guy lines. String a tiny light along high-traffic paths. These small investments pay enormous dividends when nature calls at 3 a.m. and you’re half asleep.
Pro tip: test your reflective gear before you need it. Shine a light on it from various angles. Make sure it actually works. Otherwise, you’re just decorating with optimism.
15. The "Check Twice" Exit
Zippers are finicky. They work perfectly until they don’t. And they usually stop working at the worst possible moment—like during a rainstorm, or when mosquitoes are conducting organized invasions.
Before finalizing your stakes, zip all doors. Walk around. Check every zipper. Make sure everything closes smoothly. If the tent is pulled too tight over uneven ground, the zippers may stress and break. A broken zipper means bugs get in. Cold gets in. You get annoyed.
Fix it before it breaks. Adjust stake positions if zippers bind. Reposition the tent body if doors won’t close properly. This five-minute check saves hours of frustration later.
Also check that doors open the way you want them to. Nothing’s worse than setting up your tent, staking everything perfectly, and then realizing your door opens into a bush. Or a tree. Or the only path to the bathroom.
16. Level with Natural Debris
Sometimes you misjudged the slope. Maybe you thought the ground was flat. Maybe you were wrong. It happens to the best of us. Maybe the site looked perfect until you actually lay down and felt yourself slowly migrating toward the tent wall.
If you’re stuck on a slight incline and can’t move, get creative. Use extra clothing or dry leaves placed under your tent footprint to “shim” up the low side of your sleeping pad. This creates a more level surface without moving your entire tent.
Nature provides. Use what’s there. Just make sure the leaves are dry. Wet leaves are just sadness in plant form. They’ll compress, rot, and generally make everything worse.
For serious slopes, roll up a jacket or spare clothes and place them under the edge of your pad. Create a wedge. Engineer your way to comfort. Your ancestors survived without level ground. So can you.
17. Mark Your Perimeter in Low Visibility
Fog happens. Dense woods happen. Getting lost between your tent and the bathroom happens more often than you’d think. When every tree looks identical and your tent blends into the landscape, navigation becomes surprisingly difficult.
In dense woods or foggy terrain, use a small light or a piece of reflective gear to mark the path. Put it between your tent and your “bathroom” area. This way you don’t lose your bearings in the middle of the night.
Wandering around in the dark, holding toilet paper, whispering “where’s my tent?” is not a core memory anyone wants. It’s embarrassing. It’s cold. And it usually ends with you walking into spider webs.
Use multiple markers if needed. String a small LED light from a branch. Hang reflective ribbons at eye level. Create a trail of breadcrumbs that actually works. Your 3 a.m. self will be profoundly grateful.
Conclusion
Mastering these steps ensures that you aren’t just “surviving” the night, but actually enjoying the landscape you traveled so far to see.
Now get out there and sleep better than a bear in February. Just maybe keep the snacks somewhere else.
And watch out for that raccoon. He’s definitely plotting something.


