The goal of this entire article, the nugget of wisdom I’m about to bury under 3,000 words of my personal ramblings, is simple: how to pick a great campsite.
It seems straightforward, right? Find a pretty spot, throw down your tent, and done. Oh, my sweet, summer child. If only it were that easy.
Many, many factors go into this decision. It’s part science, part art, and part learning from your own past, idiotic mistakes.
So, let’s go over what to look for. I’ll give you the good, the bad, and the downright soggy.
Table of Contents
1. The Lazy (and Smart) Person’s Guide: Start with Pre-Used Campsites

My first and most fervent piece of advice is to be gloriously, wonderfully lazy. Use spots that have already been used.
Why is this so brilliant?
First, you’re minimizing your impact. We’re visitors in these wild places. By re-using an existing site, we avoid crushing new vegetation and creating new scars on the landscape.
It’s the Leave No Trace principle in its simplest form: concentrate your impact where it’s already happened.
Second, it’s just easier. The ground is already semi-level. The rocks for a fire pit are already gathered. It’s a turn-key camping experience, minus the key.
But how do you find these spots before you’re stumbling around in the fading light?
This is where a little at-home prep turns you from a backcountry schmuck into a backcountry sherpa.
Become a Satellite Sleuth: Before I even left home, I was on my computer, scrolling through satellite maps of this very forest.
You’d be amazed at what you can see. Look for clearings just off roads or trails, areas that are a different color (often lighter, matted-down earth), or even the tell-tale glint of a parked car from a photo taken two years ago.
A small, cleared area in the middle of the woods isn’t natural; it’s a campsite waiting for you.
Once you’re on the go, this scouting continues. I use the Gaia GPS app on my phone.
The magic trick? You can download the satellite maps for offline use. So even when I have zero cell service, which is always, I can pull up the map, see a little flattened patch I spotted from my couch, and navigate right to it.
It helps you adjust your plans on the fly. Thought you’d camp by the river? The satellite view shows it’s a swampy mess. But 200 yards up the hill? A perfect little clearing.
The Takeaway: A little digital legwork before you head out saves you a lot of physical legwork and a whole lot of environmental impact.
Be lazy. Be smart. Use the spots that are already there.
2. The Foundation of All Sanity: Look for Flat and Firm Ground

Let’s talk about the actual ground your tent will sit on. This seems obvious, but you’d be shocked how many people (see: me, years ago) think, “Eh, it’s mostly flat. I’ll be fine.”
No. You will not be fine.
An imperceptible slope by day becomes a Sisyphean nightmare of a sleeping bag by night. I once pitched my tent on what I swore was a level patch of earth.
By 2 AM, I had slowly, inexorably slid down the tent floor, my face pressed against the cold, condensation-covered nylon wall, my feet pushing hopelessly against the footbox of my mummy bag.
I spent the entire night in a slow-motion, groggy struggle to push myself back up the slope, only to immediately begin the slide again.
I woke up more tired than when I went to sleep, having essentially hiked uphill in my dreams all night.
The criteria are simple: The ground must be flat and firm.
I’ve found a pre-used area, so step one is checked. Now, I’m physically crouching down, getting my eyes to ground level.
I look across the space like a carpenter checking a level. This one here… looks good. It feels firm under my boots, no squish. It’s not a marsh disguised as grass.
Now, let’s look over here, just ten feet away. See this? From standing, it didn’t look too bad. But now, crouching down, you can clearly see the land slopes downward.
If I pitched my tent here, my head would be uphill and my feet downhill, which is marginally better than the other way around, but still a recipe for a night of feeling like a human landslide.
The Takeaway: Don’t just stand and glance. Crouch down. Use your eyes like a surveyor. Better yet, lie down on the spot before you pitch the tent.
It might look silly, but it’s the ultimate test. Your future well-rested self will thank you.
3. Don’t Be a Duck: Avoid Drainages and Water Pooling Areas

This is the single most common mistake that leads to a catastrophic, soul-crushing camping experience.
You must ask yourself one critical question: If it rains, where will the water go?
A spot can look like a sun-drenched paradise at 4 PM and transform into your own personal cold-water Jacuzzi by 2 AM after a surprise thunderstorm.
Do not camp in depressed or low-lying areas. They are nature’s bathtubs.
Do not camp in what looks like a dry creek bed or a drainage path. These are nature’s water slides, and you are the unwilling participant.
This is especially critical in the desert. That beautiful, smooth, sandy wash between two canyon walls?
It’s not a campsite; it’s a death trap. Rocky desert terrain doesn’t absorb water.
When it rains miles away, that water funnels into these washes with terrifying speed and power. A flash flood doesn’t care about your fancy tent or your profound connection to the desert landscape. It will wash you and your gear away like so much confetti.
The Action: Before you pitch your tent, do a 360-degree assessment. Look at the slopes around you.
If you’re at the bottom of a hill, you’re in a collection zone. Look for high ground. Even a slight rise of six inches can make all the difference.
Ask yourself: “If I were a raindrop landing on that hillside over there, what path would I take?” Make sure your tent is not on that path.
4. Look Up, You Fool! – The Peril of the Widowmaker

We’ve been looking down a lot. At the ground, at the slope, at the drainage.
Now, it’s time to look up.
This is a step people forget in their quest for the perfect flat spot, but it might be the most important one for your literal survival.
I’m talking about Widowmakers.
A widowmaker is the colloquial, and terrifyingly accurate, term for a standing dead tree (a “snag”) or a large dead branch that is just waiting for a strong wind, a heavy snow, or a clumsy squirrel to send it crashing down.
The Safety Check: Once you’ve found a flat, dry, pre-used spot, stop. Look up. And I mean really look up.
Scan every single tree whose fall radius could possibly intersect with your proposed tent location.
Look for trees with no bark, no needles, or a silvery-gray color. Look for large, broken branches hanging precariously in the canopy.
I’m walking around my potential site right now, craning my neck. See that one? Bark is peeling off, no green on it.
It’s a solid 40-foot tall snag. Is it leaning towards this spot? It’s hard to say. But why risk it? The forest is big. My skull is fragile.
This reminder is critical because it’s so easily overlooked. We get excited. The spot is perfect!
We’re tired. We just want to set up. But taking two minutes to inspect the overhead situation is a non-negotiable insurance policy.
5. Playing Dodgeball with the Elements: Consider Weather Protection

Now that we’ve ensured we won’t be flooded or crushed, let’s talk about not being blown away or electrocuted.
You need to evaluate your exposure to the whims of weather, namely high winds and thunderstorms.
Let’s use a real-world example. Sun-dappled, soft grass, a stunning view of the stars. It’s gorgeous.
It’s also a deathtrap in a storm. Meadows, peaks, and ridges are high-risk lightning zones.
You, in your little tent, are the tallest, most interesting object for miles around from a lightning bolt’s perspective.
You are essentially waving a flag that says, “Strike Here!”
Furthermore, that beautiful, open meadow is a wind tunnel. Your tent will become a flapping, shrieking, potentially airborne kiteship of misery.
The Safer Choice: Look for a spot among small trees of a relatively uniform height. A grove of trees acts as a fantastic windbreak and gets you off the lightning attraction leaderboard.
The key is to avoid being under the tallest tree in the area.
You want to be among the trees, not directly beneath the one that’s most likely to say, “Hey lightning, over here!”
The Takeaway: Use the landscape for natural protection. A sheltered spot in a uniform grove of trees is infinitely better than an exposed spot with a “better view.”
The view from inside a stable, dry, non-electrified tent is always the best view.
6. The Goldilocks Zone: Distance from Water Sources
This one is a rule of thumb with a practical twist.
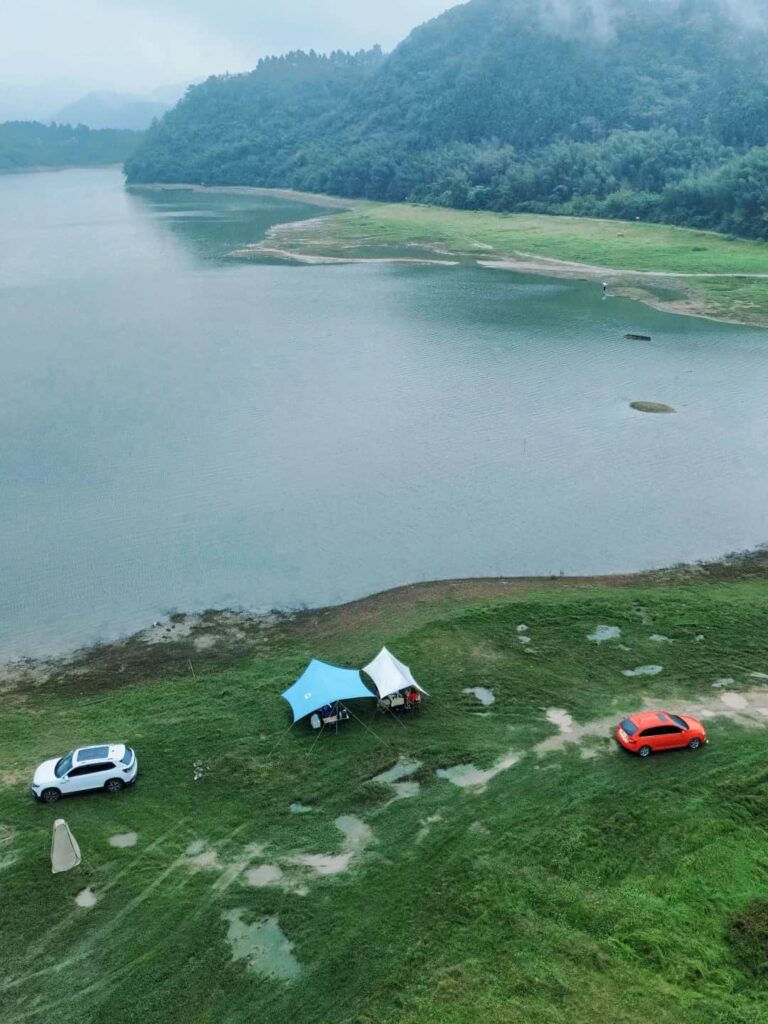
The general, and very important, rule is to camp at least 200 feet (about 70 adult paces) from any lake, stream, or river.
The Reasoning is Environmental: We do this to protect these fragile ecosystems.
It prevents erosion on the banks, protects water quality from soap, food particles, and, ahem, human waste, and gives wildlife unimpeded access to their water source.
It’s just good etiquette.
The Practical Balance: Now, for a backpacker, this creates a conundrum. You need water. Carrying a campsite 200 feet away from your water source means you have to schlep all your water for cooking, drinking, and cleaning back to camp.
The trick is to find a balance. Get your 200 feet away for your tent, but make sure it’s within a comfortable walking distance for water collection.
Don’t camp on top of the stream, but don’t camp a half-mile hike away, either.
The Key Thought: Maintain an ethical distance while staying practical for your own needs. It’s about respect, not inconvenience.
7. Putting It All Together: The Final Campsite Walk-Through

Alright, let’s see this in action. After walking around for a bit, I’ve found my spot.
Let me walk you through my final evaluation, which takes all of about 90 seconds now that I know what I’m looking for.
- Pre-Used? Check. It’s a cleared area with a existing, minimal rock ring.
- Ground? Firm and flat. I crouched down, did the visual check, and it passes. No sliding tonight!
- Trees? I’ve looked up. The trees around are all healthy, living pines. No dead-standing threats looming overhead.
- Drainage? We’re on a slight rise. If you look at the land, it slopes away from us on all sides. If it rains, the water will run away from the tent, not into it. Perfect.
See? That didn’t take long. It becomes second nature.
You’ll start doing it automatically, almost subconsciously. You’ll be walking through the woods and think, “Nope, slope,” or “Good flat spot, but wow, look at that dead hemlock.”
It’s a skill that, once learned, makes every camping trip better and safer.
8. The Luxuries: Sun and Shade Exposure

Once you’ve handled the big-ticket items—safety, flatness, dryness—you can start thinking about the luxuries. The main one is sun and shade.
This is a secondary factor, but it can dramatically improve your comfort. You just have to consider the season and temperature.
- Winter/Cold Weather: You want morning sunlight. Position your tent door to face the east, so the rising sun acts as a natural alarm clock and starts warming your tent up as soon as possible.
- Summer/Hot Weather: You want shade. Pitch your tent in the shadow of trees to avoid it turning into a solar oven by 7 AM. In this forested area I’m in, the sun dapples through the trees, providing a nice mix. The trees will shield me from the worst of the midday heat.
9. The Core Principle – It All Boils Down to Situational Awareness

If I had to distill everything I’ve just rambled about into one single, core principle, it’s this: Situational Awareness.
Camping isn’t about just being in nature; it’s about being aware of nature. It’s about reading the landscape.
Before you even think about unrolling your tent, just… stop. Pause. Listen. What do you hear? The wind? What do you see? The lay of the land? The health of the trees?
Walk the area. Not a frantic search, but a slow, observant stroll. Get a feel for the place. Understand where you are in relation to the water, the slopes, the wind, and the trees.
This simple practice—this mindful pause—is the difference between a seasoned camper and a novice.
It’s what prevents 90% of camping problems before they can even start.
Closing Thoughts from a Guy Who’s Made All the Mistakes
I didn’t learn any of this from a book. I learned it through experience. Mostly, I learned it through getting it wrong.
I’ve slept on slopes. I’ve woken up in puddles. I’ve listened to the wind howl while praying my tent pegs would hold.
These weren’t fun lessons, but they were effective teachers.
The art of picking a campsite is a fundamental skill that pays dividends in comfort, safety, and enjoyment.
It turns a stressful night in the woods into a deeply restorative experience.