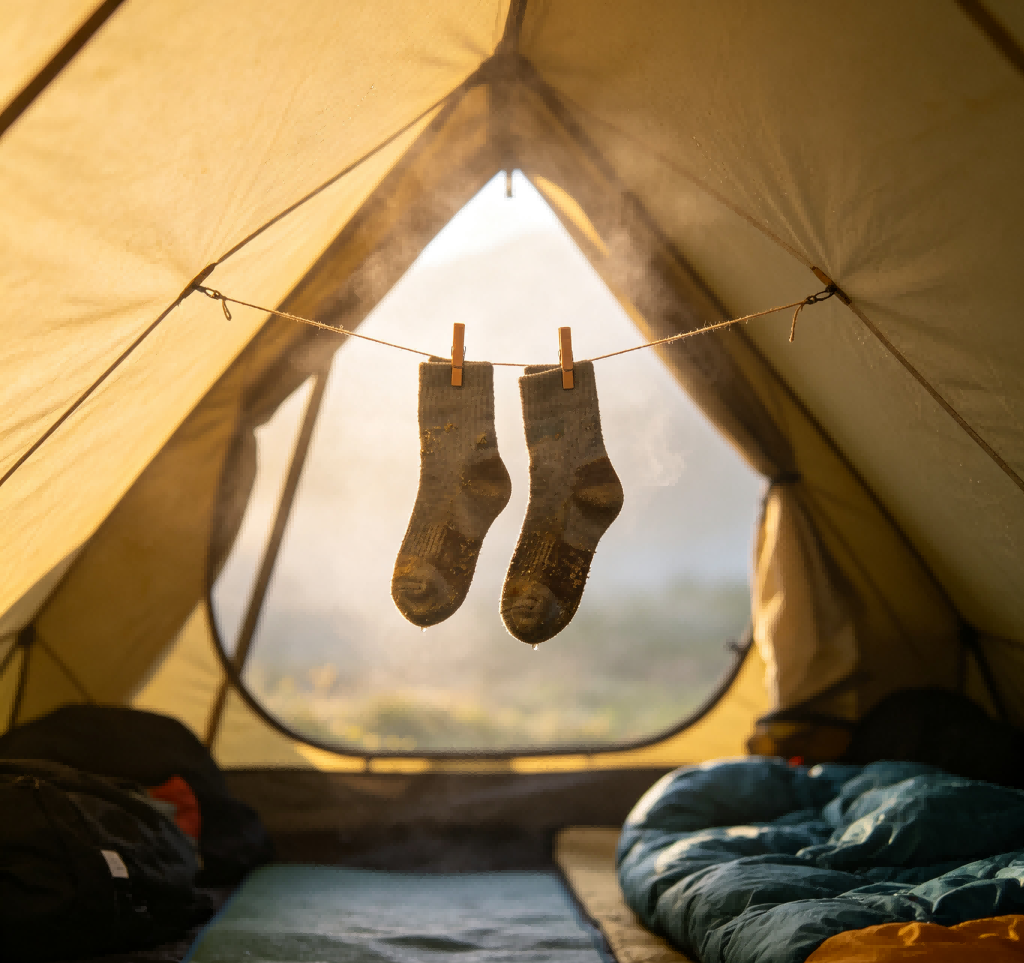
A Soggy Survivor’s Guide to Reduce Condensation In Your Tent

Spread the love

There I was, on my first-ever solo backpacking trip.

I had chosen a picture-perfect spot, my tent was pitched with the kind of geometric precision usually reserved for NASA engineers, and I was cozy in my sleeping bag, listening to the peaceful sounds of the forest.

I drifted off to sleep feeling like a modern-day Thoreau.

I awoke several hours later to a cold drip on my forehead. Then another.

I opened my eyes to a terrifying sight: my tent ceiling was glistening in the moonlight, pregnant with dewdrops, poised to unleash a miniature, indoor thunderstorm directly onto my face.

My sleeping bag’s hood was damp. My prized fleece, which I’d used as a pillow, felt suspiciously clammy.

A panicked flail confirmed my worst fear—the side of my sleeping bag that was touching the tent wall was a soggy mess.

I wasn’t leaking. I was being rained on from the inside. I had become a human stew, slowly simmering in my own personal broth.

I spent the rest of the night curled in a fetal position in the only dry patch left, questioning all my life choices that led me to this cold, damp moment.

Friends, I had been initiated into the universal, frustrating, and deeply unglamorous rite of passage: Tent Condensation.

Table of Contents

The Science Bit (Or, Why My Tent Thinks It’s a Sauna)

Let’s break down the villain of our story. Condensation isn’t a sign of a faulty tent (usually); it’s simple physics being a jerk.

Imagine you’re holding a cold beer on a hot day.

What happens? The outside of the can gets wet. That’s condensation.

Your tent is that beer can. The cold night air chills the tent fabric, and when the warm, moist air from inside (generated by your magnificent, life-sustaining body) hits that cold surface, it can’t hold all that moisture anymore.

So, it dumps it. Right onto your $300 sleeping bag.

The two key ingredients for this recipe of regret are:

1. Humidity Inside the Tent: This comes from you. Yes, you. Your breathing, your sweating, your very existence is a humidifier.

2. Temperature Difference: The bigger the gap between the toasty inside and the frigid outside, the more likely you are to host your own indoor dew collection.

The Simple Takeaway: Less humidity + a smaller temperature difference = less condensation.

The Art of Tent Selection: Picking Your Dry(ish) Fortress

Your first line of defense is the tent itself. Not all tents are created equal, especially when it comes to handling your moist exhalations.

Double-Wall Tents: The Socially Distanced Dream

Think of a double-wall tent as a two-bedroom apartment. You have the inner tent, made of lovely, breathable mesh, where you sleep.

Then, you have the rainfly, a waterproof tarp, that lives a few inches away from the inner tent, like a grumpy neighbor who protects you from the rain.

How it Works: The warm, humid air from you passes through the mesh inner. It then hits the cold underside of the rainfly, where it condenses.

The key here is that the condensation forms on the rainfly, NOT on the inner tent where your gear is. The air gap is the VIP lounge, keeping the riff-raff moisture away from you.

The Verdict: Less condensation buildup on your actual sleep system. It’s the “set it and forget it” option for condensation management.

The Catch: It’s heavier and bulkier. You’re carrying that two-bedroom apartment on your back.

Single-Wall Tents: The Minimalist’s Misty Cave

A single-wall tent is a studio apartment. The wall is also the ceiling, and everything is right there. The waterproof layer is attached directly to the bathtub floor.

How it Works: There’s no air gap. The cold outside air chills the single layer of fabric. Your warm, moist breath hits that cold fabric, and the condensation forms directly on the inside of your living space.

You will likely touch it. Your gear will likely touch it. It requires the vigilance of a bomb disposal expert to manage.

The Verdict: Ultralight and packable, but you’re signing up for a higher-maintenance relationship with moisture.

My Advice: If you’re a beginner, or if you camp in consistently cool/cold conditions, start with a double-wall tent. Your sanity will thank you.

Pro-Tip on Tent Shape and Size:

It’s not just about the walls; it’s about the geometry. A coffin-shaped tent might be light, but if you so much as sneeze, you’ll brush against a condensated wall.

Look for tents with steeper walls to maximize the volume where your damp air can hang out without bothering you.

Also, multiple vestibules and ventilation panels are like having multiple windows you can crack open to let the party guests (humid air) leave.

A single, small vestibule is like having only one narrow exit at a crowded concert—it causes bottlenecks, in this case, of moisture.

Location, Location, Condensation: The Campsite Real Estate Game

You wouldn’t build your dream house on a swamp, so don’t pitch your tent in one. Your campsite choice is arguably the most critical factor in the condensation battle.

The Microclimate is Your Landlord

Under Trees > Open Field: Trees are nature’s insulation. They trap some of the earth’s warmth, reducing the radiant cooling that makes your tent so cold.

An open field or a high ridge exposes you to the full brunt of the cold night sky, maximizing that temperature difference. Trees = good.

A field under a starry, cloudless sky = a beautiful, dewy nightmare.

Hazard Check: Before you get too excited about the perfect tree cover, do the “widowmaker check.”

Look up! Are there dead branches poised to become a surprise guest in your tent during a gust of wind? Safety first, dryness second.

Elevation is Everything

Bottom of Valleys: This is the “Cold Air Sink.” Cold air is heavy, and it rolls down hills and collects in valleys like water.

These spots are also often more humid. Camping here is like choosing to sleep in a refrigerator’s vegetable drawer.

High Ridges: Sure, the view is great, but you’re exposed to all the wind, which can be bitterly cold and make condensation management a battle against the elements.

The Sweet Spot: Aim for the middle elevation on a slope, with a bit of wind protection from trees or a small roll in the land. You avoid the cold air pool and the worst of the wind.

Avoid the Humid Embrace of Water

This should be obvious, but I’ve done it, so I know the temptation is real. Do not camp right next to a lake, river, stream, or—heaven forbid—a marsh.

These are giant, open-air humidifiers. The air is literally full of water, just waiting for a cold surface to call home. Camp at least 200 feet away for a noticeably drier experience.

Ventilation: Giving Your Breath an Escape Route

Ventilation is the art of encouraging the moist air to leave your tent before it settles down and starts a family on your walls.

Open the Vestibules: If it’s not actively raining or super foggy, open those vestibules up! Think of it as installing a screen door.

You can leave the main bug net zipped for protection, but crack the rainfly doors wide open. This creates a cross-flow, allowing the humid air to escape and drier air to enter.

Pitch for Performance: A sloppily pitched tent can block built-in ventilation panels. Make sure your tent is taut and those panels are open and functional.

A saggy rainfly pressed against a mesh panel is like putting a sock in the exhaust pipe.

Single Vestibule Strategy: If you have a tent with only one main vestibule, sleep with your head towards it.

Your breath is the primary source of moisture, so you want to point the exhaust pipe (your face) towards the exit.

It feels a bit like you’re sleeping in a doorway, but it works.

Stop Adding Fuel to the Fire (Or, Moisture to the Air)

We are the problem, it’s true. But we can be a smaller problem.

Do NOT Cook Inside Your Tent: I know, I know. It’s cold and windy outside, and the idea of boiling water from the cozy confines of your sleeping bag is divine.

DON’T. A boiling pot releases an astonishing amount of water vapor directly into your enclosed space.

You’re not just cooking dinner; you’re pressure-cooking your tent interior. Plus, you’ll marinate your gear in food smells, which is basically sending a formal, scented invitation to every bear and raccoon within a five-mile radius.

Avoid Drying Wet Clothes Inside: Your soaking wet socks and rain jacket are a reservoir of moisture.

Hanging them inside is like wringing them out directly into your air supply. Instead, put them in a trash bag or a dry sack overnight.

They won’t get any drier, but they also won’t make things worse. Let the sun do the work the next day.

Reduce Loitering Time: The more time you spend awake and breathing heavily (ahem) inside the tent, the more humidity you add.

Set up camp, then sit outside on a log, enjoy the fire, look at the stars.

Be in nature, not just next to it from inside your nylon dome.

The Breathing Technique: This sounds crazy, but it’s a game-changer. Breathe through your nose. Nasal breathing adds about 40% less moisture to the air than mouth breathing.

It’s also just better for you. When you sleep, try to consciously nose-breathe.

If you’re a chronic mouth-breather (no judgment), you might just have to accept a bit more localized moisture.

Maybe point your mouth towards the vestibule.

Gear Management: The Final Frontier of Dry

It’s not just about the air; it’s about what you do with your stuff.

The Backpack Foot-Saver: In a moment of desperation, I once thought putting my feet inside my “water-resistant” backpack would be a great way to keep them warm.

I awoke with feet that were not just cold, but also damp and smelled faintly of granola bar.

A water-resistant shell traps the moisture your feet perspire, creating a microclimate of misery. Just wear dry socks.

Embrace Breathable Gear: From your sleepwear to your sleeping bag’s shell, breathable materials allow moisture from your body to dissipate instead of being trapped next to you.

Pitch it Tight: A taut pitch isn’t just for looks. It pulls the walls steeper, reducing the chance of your sleeping bag or head touching a damp wall.

Use all the guylines! If the ground is too hard for stakes, get creative. Use a stick in a “deadman’s anchor” or prop sticks under the guylines to create a better angle.

A tight tent is a happy tent.

Waterproof Your Down: If you use a down sleeping bag or quilt, be aware that damp down loses its loft and insulating power.

A quick spray with a DWR (Durable Water Repellent) treatment can help the down resist absorbing ambient moisture, keeping you warmer.

The Morning After: Wiping Away the Sins of the Night

Even if you follow all these steps perfectly, you might still get a little condensation. The key is to not pack it away wet.

The Great Air-Out: As soon as you wake up, open both vestibules wide. Let the air flow through. Then, remove all your gear—sleeping bag, pad, everything—and lay it out in the sun (if you’re lucky) or in a breezy spot.

The 20-Minute Miracle: Give your empty tent about 20 minutes. The sun and wind will work together to evaporate the condensation from the rainfly (double-wall) or the inner fabric (single-wall). You can literally watch it disappear.

The Towel Trick: For stubborn droplets, especially in a single-wall tent, a small, packable microfiber towel is your best friend. A quick wipe-down before you start packing makes all the difference.

The Result: This simple routine ensures you are packing a dry tent. A dry tent is a mold-free, smell-free, and happy tent, ready for another night without subjecting you to a surprise shower.

Bonus Tips: Embracing the Damp

Sometimes, you can’t beat it. You’re in a cloud, it’s pouring rain, and the humidity is 100%. In these cases, shift your strategy from prevention to management.

Correct Pitching: A well-pitched tent with taught walls will at least ensure the condensation drips in a controlled manner, rather than sagging onto you.

Proper Insulation: A good sleeping bag with a waterproof/breathable bivy sack (if needed) will keep you warm even if the air around you is damp.

The Routine is Key: No matter what, never skip the morning air-out. It’s the most non-negotiable step in the entire process.v

Conclusion: From Soggy to Savvy

Condensation might be an inevitable part of camping, but it doesn’t have to ruin your trip.

With these strategies, you can reduce it, manage it, and wake up ready to enjoy the sunrise, not wring out your socks.

Now, I’d love to hear from you! What’s your best (or worst) condensation story? Do you have a secret trick I missed?

Share your wisdom in the comments below and help our community of adventurers stay a little drier.

Leave a Comment

Your email address will not be published. Required fields are marked *

Scroll to Top