While a mountain stream might look crystal clear, it can harbor invisible bacteria, protozoa, or viruses that can turn a fun trip into a digestive nightmare.
Ensuring your cooking water is safe is a non-negotiable skill for any outdoor enthusiast.
Let’s dive into the dos and don’ts of backcountry hydration, shall we?
Table of Contents
1. Identify Your Source: Become a Water Detective
Always look for flowing water rather than stagnant ponds. Moving water is less likely to host heavy concentrations of algae and bacteria.
Think of it this way: stagnant water is where microorganisms throw pool parties.
Flowing water? That’s just a lazy river they occasionally float down.
When you approach a potential water source, observe it like you’re investigating a crime scene.
Is it moving? Can you see the bottom? Are there dead animals floating nearby? (If yes, walk away. Just walk away.)
A babbling brook tumbling over rocks is your gold standard. A murky pond with mosquito larvae doing the backstroke? That’s a hard pass.
Remember, you’re looking for hydration, not a biology experiment.
2. Use a Pre-Filter: Give Your Gear a Break
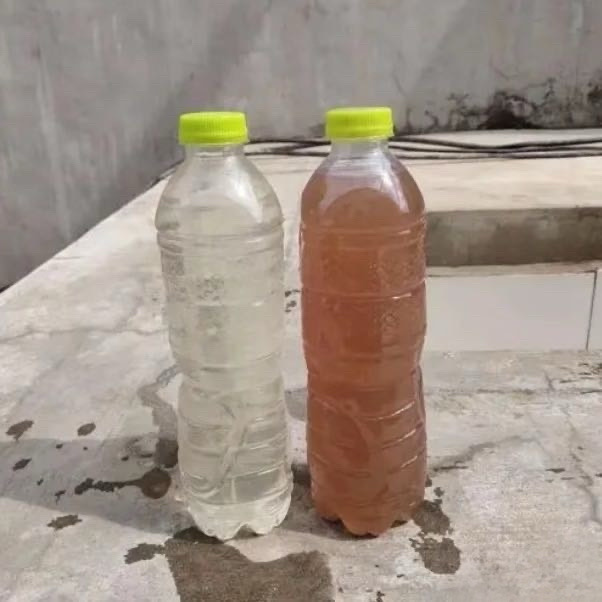
If the water is silty or cloudy, pour it through a coffee filter, bandana, or fine mesh before starting your primary purification.
This step removes large sediment that would otherwise clog your fancy filter faster than a teenager clogs a drain with hair.
Let’s be honest here: drinking muddy water is unpleasant even when it’s safe.
That gritty texture between your teeth? Nobody signed up for that.
A simple bandana pre-filter costs nothing and saves you from chewing your dinner.
Plus, watching murky water transform into something resembling actual drinking water is oddly satisfying.
It’s like magic, except the magician is you, and the trick is “not swallowing dirt particles.”
3. The "Rolling Boil" Rule: When in Doubt, Boil the Daylights Out of It
Bringing water to a vigorous, rolling boil is the most effective way to kill pathogens.
We’re talking angry bubbles. Volcano simulator.
The kind of boil that makes your pot lid rattle like it’s trying to escape.
Here’s the beautiful thing about boiling: it doesn’t care what kind of creepy-crawlies are lurking in your water.
Bacteria? Dead.
Protozoa? Toast.
Viruses? Sayonara.
Boiling is the nuclear option of water purification, and sometimes, you just need to go nuclear.
No special equipment required, just fire and a pot.
It’s the original water filter, and it’s been working since humans figured out that cooked things taste better and kill fewer people.
4. Adjust for Altitude: Physics Gets Involved
At sea level, water boils at 100°C. However, at higher elevations, the boiling point drops.
You must boil for at least 1 minute, or 3 minutes if you are above 2,000 meters.
Here’s the science: water gets lazy at altitude. It thinks it’s boiling when it’s actually just warm and pretending.
That rolling boil you’re watching at 10,000 feet? It’s about 90°C, which is hot enough to make tea but not hot enough to instantly murder every pathogen.
Give it those extra minutes.
Let the bubbles work overtime. Your intestines will thank you for not cutting corners just because you’re impatient and hungry.
5. Leverage Cooking Heat: Let Dinner Do the Work
If you are making soup or boiling pasta, the cooking process itself usually purifies the water.
This saves you the step of purifying it separately beforehand.
Why purify water twice? That’s just inefficient, and we’re not about that life.
If you’re boiling pasta for ten minutes, congratulations—you’ve also been purifying water for ten minutes.
It’s multitasking at its finest. You get dinner, and you get safe water, and everybody wins.
Just make sure that rolling boil actually happens.
Dropping pasta into lukewarm water doesn’t count, and now you have soggy noodles AND giardia. Nobody wants that combo.
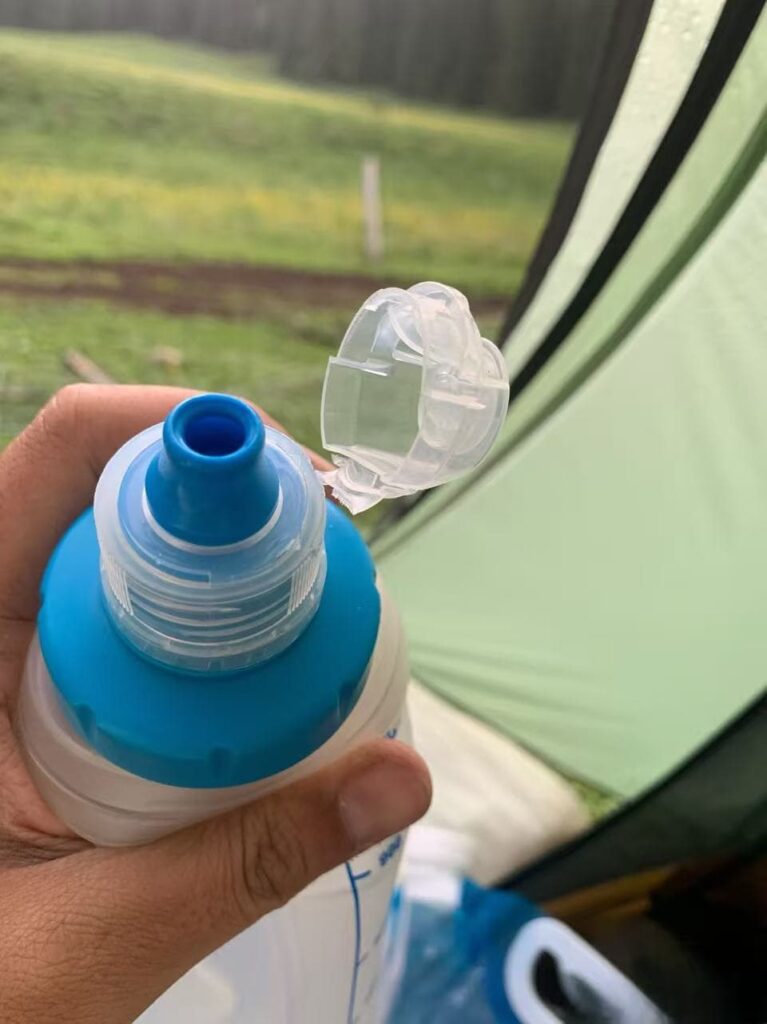
6. Hollow Fiber Filters: The Squeeze Is Real
Use a “squeeze” or gravity filter for large volumes of cooking water.
These remove 99.99% of bacteria and protozoa.
These little wonders look like something from a spy movie.
You squeeze a bag, water comes out clean, and you feel like a hydration superhero.
The Sawyer and Katadyn brands have basically become household names among hikers, and for good reason.
They work, they’re lightweight, and they don’t require you to carry fuel or wait for tablets to dissolve.
The only downside? Squeezing that bag for a family-sized pot of mac and cheese will give you forearm workout you didn’t ask for. Consider it free arm day at the gym.
7. Chemical Tablets: The Taste of Adventure
Use Iodine or Chlorine Dioxide tablets for a lightweight backup.
Note that these require a “dwell time” before the water is safe to use.
Nothing says “I’m a rugged outdoorsperson” quite like drinking water that tastes vaguely like a swimming pool.
Chemical tablets are lightweight, cheap, and they work. The catch? You have to wait. Thirty minutes minimum, sometimes sixty.
In our instant-gratification world, waiting an hour for water feels like an eternity. But patience is a virtue, and in this case, patience prevents parasites.
Drop the tablet, set a timer, and go set up your tent. By the time your shelter is ready, your water will be too.
8. Activated Carbon: Say Goodbye to Swamp Flavor
If your water source is near a trail or farm, use a filter with a carbon core.
This helps remove pesticides, heavy metals, and “swampy” tastes.
Sometimes, safe water still tastes terrible. Maybe it’s picked up some organic compounds that won’t kill you but will make you wrinkle your nose with every sip.
Activated carbon is the friend that removes that swampy essence and leaves you with something that actually tastes like water.
It’s the difference between “I’m hydrating to survive” and “Hey, this is actually refreshing.” You’re already carrying the weight—you might as well enjoy the taste.
9. Practice "Kitchen Hygiene": Keep Your Dirty Business Separate
Never dip your dirty cooking pot directly into the stream.
Use a dedicated “dirty” bag to collect water and avoid cross-contaminating your cookware.
Here’s a scenario: you just finished eating, your pot has food residue, and you need water for morning coffee.
Dipping that greasy pot into the stream contaminates the water source for everyone downstream, including wildlife and other hikers.
It’s rude. It’s unsanitary. Don’t do it. Carry a separate bag for collecting water, and keep your cookware away from the source.
Leave no trace applies to your pot grime too.
10. Clean Your Hands First: The Obvious Step Everyone Forgets
Purification is useless if you touch your clean water or food with hands that just handled “raw” lake water.
You just spent twenty minutes boiling, filtering, or chemically treating your water. You’re proud. You’re victorious.
Then you dip your unwashed, lake-water-dripping hand into that clean pot to grab a tea bag.
Congratulations, you’ve just re-contaminated everything.
Hand sanitizer exists for a reason. Use it. Wash your hands. Break the cycle of cross-contamination before it breaks your digestive system.
11. The 200-Foot Rule: Give It Some Distance
Always collect your water at least 200 feet upstream from where you (or others) are washing dishes or yourself.
Think of a stream as a conveyor belt of contamination. Everything upstream eventually comes downstream.
If you’re collecting water downstream from someone’s dishwashing station, you’re basically drinking their leftovers.
That’s gross. Walk upstream. Put some distance between yourself and other humans. Two hundred feet is about seventy big steps.
Take those steps. Your water will be cleaner, and you’ll get a little extra exercise.
12. Winter Melting: Don’t Burn Your Snow
When melting snow for cooking, always keep a little “seed water” in the bottom of the pot to prevent scorching.
Snow is just frozen water, right? So you can pack a pot full of snow, put it on the stove, and walk away.
Wrong. Snow is an insulator. Without liquid water at the bottom, the snow closest to the heat source will scorch before the rest melts.
You’ll end up with burnt-tasting water and a pot that’s a nightmare to clean. Add a cup of water first.
Let that liquid heat up and slowly accept the snow like a warm hug. Your taste buds will thank you.
13. Check Your Seals: Tiny Leaks, Big Problems
Ensure the O-rings on your filters are lubricated and intact. A tiny leak can allow unpurified water to bypass the filter completely.
O-rings are the unsung heroes of water filtration. They’re small, rubbery, and utterly essential. If they’re cracked, dry, or missing, your filter becomes a fancy decoration rather than a functional tool.
Water will find the path of least resistance, and if that path bypasses the filter media, you’re drinking straight from the stream with extra steps.
Check your seals before every trip. Lubricate them if needed. Respect the O-ring.
14. Watch the "Drip": Contamination Is Sneaky
When pouring purified water into a pot, ensure no “raw” water droplets from the outside of your collection bag drip into the clean container.
You’ve filtered the water. It’s pristine. It’s perfect.
Then you pour it from your dirty bag into your clean pot, and a droplet from the outside of the bag runs down and falls in.
That droplet contains unfiltered lake water. You’ve now inoculated your entire pot with whatever was in that original source.
Be careful. Pour deliberately. Wipe the outside of your bag first if you’re nervous. Contamination is sneaky, but you can be sneakier.
15. Neutralize the Taste: Goodbye, Pool Water
If using iodine tablets, a pinch of Vitamin C powder after the dwell time removes the chemical taste and color.
Iodine water tastes like regret and public swimming pools.
It’s safe, but it’s not pleasant. Fortunately, vitamin C neutralizes both the taste and the color, leaving you with something that actually resembles normal water.
Don’t add it before the dwell time, though—vitamin C renders iodine ineffective, so you’d be drinking untreated water that tastes slightly better.
Wait the full thirty minutes, then add your flavor saver. You’re welcome.
16. Backflush Regularly: Keep That Flow Going
If you are filtering water for a large group meal, backflush your filter frequently to maintain a fast flow rate.
Filters clog. It’s what they do. They catch all the nasty stuff, and eventually, they get full.
Backflushing pushes water in the opposite direction, clearing out the gunk and restoring flow.
If you’re cooking for a group, you’re moving a lot of water. Backflush between pots. Keep that flow rate respectable.
Nobody wants to spend forty minutes squeezing water for a five-minute meal. Efficiency matters.
17. Store "Dirty" and "Clean" Separately: Label Your Life
Clearly mark your water containers so you never accidentally use unpurified water for a “no-cook” meal or for rinsing produce.
In the dark, in the rain, when you’re exhausted and just want food—this is when mistakes happen.
You grab a bag, assume it’s the clean one, and soak your tortilla wraps in untreated stream water.
Now your dinner is a petri dish. Label your containers. Use different colors. Develop a system. Future you, tired and hungry at 9 PM, will be eternally grateful.
Conclusion
Safe water is the foundation of backcountry health. Whether you prefer the “fire and brimstone” approach of a rolling boil or the high-tech precision of a microfilter, the key is consistency.
By integrating these steps into your camp routine, you ensure that the only thing you take home from your trip is good memories—not a waterborne illness.
Now get out there, cook something delicious, and drink up.
The wilderness is waiting, and you’re officially prepared to enjoy it without inviting microscopic hitchhikers along for the ride.