5 Mistakes Using Trekking Poles You’re Probably Made And How to Avoid

Spread the love

For the first few years of my hiking career, I thought trekking poles were for people who were either 90 years old or had recently escaped a medical drama.

I was young(ish), spry(ish), and far too cool for what I derisively called “four-wheel drive for people.”

My comeuppance arrived on a muddy, soul-crushingly steep trail. I was a mess.

My legs were Jell-O, my knees sounded like a bowl of Rice Krispies, and I spent more time on my backside than a toddler learning to walk.

I watched in jealous awe as a sprightly octogenarian practically floated past me, her trekking poles ticking against the rocks like metronomes of my own humiliation.

That day, I swallowed my pride and bought a pair. And for the next two years, I used them… incorrectly.

I was a walking, stumbling, pole-clattering disaster. I wasn’t a graceful mountain goat; I was a wounded spider on roller skates.

It wasn’t until a seasoned trail veteran took pity on me that I learned the truth: using trekking poles wrong isn’t just inefficient, it’s a one-way ticket to Dislocationville.

So, I’ve compiled all my foolishness into this guide. Think of it as my gift to you, so you can skip the embarrassing phase and go straight to looking like a pro.

Table of Contents

Introduction: Why Trekking Pole Technique Matters

If you’ve ever seen a hiker on the trail, arms flailing, poles clicking together in a sad, chaotic rhythm, you’ve witnessed a failure of technique.

Many of us, in our well-intentioned ignorance, use trekking poles as expensive, pointy walking sticks. We think, “How hard can it be? Pointy end down, right?”

Wrong. So, so wrong.

Using trekking poles incorrectly leads to two main catastrophes:

  • a. Inefficient Use: You’re carrying around an extra pound of gear for no reason. You’re not getting the propulsion, the stability, or the upper-body workout. It’s like buying a Ferrari and only ever using it to drive to your mailbox and back. You have a powerful tool in your hands, and you’re using it to poke suspicious-looking mushrooms.

  • b. Risk of Injury: This is the scary part I blissfully ignored. Incorrect handling, especially with the straps, can turn a simple stumble into a thumb dislocation or a nasty fracture. Yes, you read that right. You can break your own thumb with your own safety equipment. The irony is thicker than a pair of fresh wool hiking socks.

But before we dive into the cringe-worthy gallery of my personal mistakes, let’s first establish why these fancy sticks are worth mastering in the first place.

They are, I can now confess, the single best piece of gear I own, second only to my boots.

Six Key Benefits of Trekking Poles

1. Improved Stability: This is the obvious one. On mud, snow, scree, or river crossings, two extra points of contact are the difference between a confident stride and a face-full of mud.

It reduces the chances of slipping or performing an unplanned, involuntary ankle-twisting dance I like to call the “Trail Tango.”

2. Increased Speed: This one surprised me. When you use them correctly, each pole plant gives you a little push forward.

It’s like having a tiny, polite superhero in each hand, giving you a boost with every step.

This is especially noticeable on uphills, where you can actually pull yourself up, transforming from a wheezing mess into a powerful, mountain-conquering engine.

3. Better Weight Distribution: Your legs are carrying the entire load of you, your pack, and your questionable decision to bring three hardcover books “just in case.”

Trekking poles transfer some of that workload to your arms, shoulders, and back. It’s like carpooling for your muscles.

This lets you hike longer distances with less fatigue, which means you have more energy at camp to do important things, like complain about how much your feet hurt.

4. Upper Body Workout: Forget the gym! Trekking poles engage your arms, shoulders, chest, and triceps.

You’re no longer just going for a walk; you’re having a full-body workout disguised as a walk in the woods.

You’ll get back to the trailhead with the satisfying fatigue of someone who has actually used their entire body, not just their complaining legs.

5. Reduced Knee Stress: This is the big one. The holy grail. The reason I will now evangelize about poles to anyone who will listen (and many who won’t).

On descents, your poles absorb a significant amount of the impact that would otherwise brutalize your knees.

Less load on your knees means fewer long-term joint problems and, crucially, allows you to continue this wonderful hobby into your 60s, 70s, and beyond.

I’d like to still be hobbling up a mountain when I’m 80, and my knees agree.

6. Practical Multi-Use Tool: Beyond hiking, they’re the Swiss Army knife of the trail. You can use them to:

  • Gently discourage an overly curious animal (just wave them around to look bigger).
  • Test the depth of a murky puddle before committing your dry socks to it.
  • Clear spider webs from the trail (a noble and vital service).
  • Serve as the poles for a trekking-pole-supported tent, saving you precious pack weight. It’s gear that does double duty, and who doesn’t love that?

Common Mistake 1: The Thumb-Trap of Doom (Incorrect Strap Usage)

This was my signature move for years. I’d shove my hand through the top of the strap like I was putting on a backpack strap, then grip the handle.

It felt secure! It felt right! It was, in fact, a perfect trap for my own thumb.

The Problem: In a fall, this technique means your thumb can get violently yanked and trapped between the strap and the pole.

The result? A nasty thumb dislocation, ligament damage, or even a fracture. You’re essentially building a custom-designed thumb-snaring device.

The Correct Way (The Great Liberation):

  1. Look at the strap. See the bottom of the loop? That’s your entry point.
  2. Insert your hand from the bottom, coming up through the strap.
  3. Now, lay your palm down over the handle, so the strap is sitting between your thumb and index finger, across the back of your hand.
  4. Grip the handle.

Congratulations! You have just disarmed the thumb-trap of doom. Now, if you fall, the pole will release safely from your hand instead of taking your thumb with it for a horrible ride.

Strap Adjustment Tip: Adjust the strap so that when your hand is through correctly and you relax your grip, letting the pole hang, your grip feels balanced and comfortable.

This setup ingeniously shifts part of the weight-bearing load to your wrist via the strap, saving your fingers and forearm from doing all the work.

It’s like a suspension system for your hand.

How to Grip the Trekking Poles Correctly (It's Not Just Clenching)

Gripping the poles isn’t a constant, white-knuckled death grip. You’ll tire out your forearms in minutes. It’s a dynamic process.

  • Flat Terrain / Uphill: Grip the pole normally by wrapping your fingers around the handle. Your grip should be firm but relaxed, like you’re shaking hands with a respected colleague, not strangling a nemesis.
  • Downhill: This is where it changes. Grip the pole from the top, pressing downward on the handle for better control and stability. It feels a bit weird at first, like you’re trying to crush a can on your handle, but it gives you immense control over your descent.

Common Mistake 2: The Inefficient Flail (Poor Pole Placement)

For a long time, my pole placement looked like I was trying to conduct an invisible orchestra while fighting off a swarm of bees.

I’d plant them too far in front, too wide apart, or sometimes, I’m pretty sure, just in the general vicinity of the ground.

The Correct Technique (Flat or Uphill Terrain):

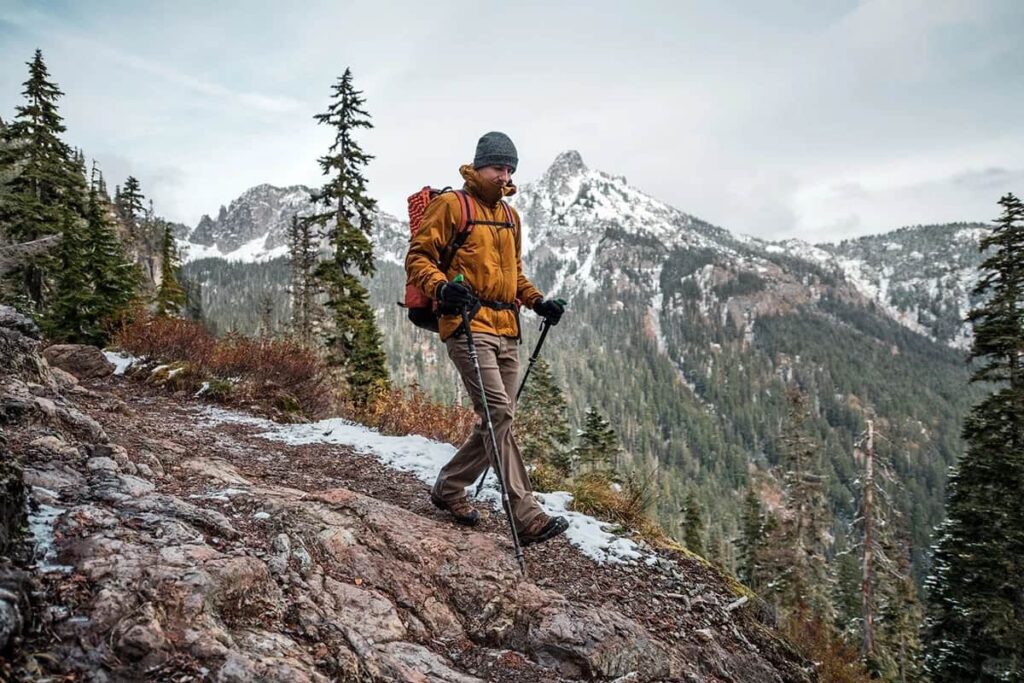
  • Your poles should align roughly with your shoulder width, not way out to the sides.
  • The tip should be placed slightly behind your front foot, not next to it or ahead of it.

Why? Physics! Planting the pole behind you allows you to push yourself forward. You’re using your arm and shoulder muscles to propel your body.

If you plant it in front, you’re just using it as a crutch to pull yourself along, which is far less efficient and more tiring.

You’re not pulling yourself forward; you’re pushing the earth behind you. Feel powerful yet?

Mastering Downhill Trekking Pole Technique

Downhills are where poles go from “nice to have” to “non-negotiable life-savers.”

My old technique was to tentatively poke the ground and then hope for the best as I skidded down. This was, to put it technically, bad.

Rule 1: Lead with the Pole! Before you commit your foot to a potentially slippery or unstable spot, plant your pole there first.

Ensure it’s stable and has solid contact with the ground. This is your anchor. This one habit will prevent more slips and ankle sprains than you can imagine.

Two Main Techniques for Downhill:

  • a. Moderate Slopes: Use the natural opposite arm/leg motion. As your right foot steps forward, your left pole plants in front of or next to it, and vice versa. This maintains a steady rhythm and at least two points of contact with the ground at all times. Three is even better.

  • b. Steep or Rocky Slopes (The “Double Pole Plant of Power”): This is your go-to move for sketchy terrain. Plant both poles widely in front of you, firmly and confidently. Then, and only then, step forward between them. Repeat. It’s a slow, deliberate, but incredibly stable method. You become a slow-moving, four-legged tank of balance.

Common Mistake 3: The Goldilocks Problem

My first poles were set to a random length and I never changed them. Uphill, downhill, flat—it was all the same.

I was like Goldilocks, except all the porridge was wrong.

Ideal Length for Flat Terrain:

This is the baseline. Stand on flat ground in your hiking boots. Hold the pole with your elbow at a 90-degree angle.

The pole should be vertical. If your elbow is more or less than 90°, your poles are too long or too short. This is the “just right” setting.

Adjustments for Terrain (This is the game-changer):

  • Downhill: Extend your poles slightly longer. This prevents you from having to bend over uncomfortably and gives you better leverage for braking and stability.
  • Uphill: Shorten your poles slightly. This gives you better leverage to push yourself up without overextending your shoulders.

Personal Preference Tip: For most hikes with rolling terrain, just keep them at the 90-degree flat-ground setting.

Only bother adjusting for extended, sustained steep sections. The constant adjusting can drive you nuts.

Common Mistake 4: The Robot Walk (Wrong Pole-Foot Coordination)

This is the most common rhythmic mistake. Beginners often plant the pole on the same side as the stepping foot (right foot forward, right pole forward).

This looks robotic, feels awkward, and offers zero stability benefits. You’re essentially walking with two independent, uncoordinated sticks.

The Correct Coordination (The Natural Gait):

You already know how to do this! It’s exactly how you walk naturally.

When your right foot steps forward, your left arm swings forward. So, your left pole should plant.

This opposite arm/leg motion is biomechanically efficient and creates a natural, balanced rhythm.

It increases stability dramatically because you always have a wide, triangulated base of support.

Try it. Walk around your living room. See? You’re a natural! Now just add poles without overthinking it.

Common Mistake 5: Accessory Amnesia (Using the Wrong Tips and Baskets)

I used to think the little rubber caps and snow baskets were permanent fixtures.

I hiked for years with the rubber feet on, wondering why my poles skittered uselessly over rocks and roots.

I was essentially trying to write on a whiteboard with a dried-out marker.

When to Use Each:

  • Rubber Caps (Pawz): Only for paved roads, concrete, or inside the visitor center. They dampen sound and prevent your carbide tips from scratching the pavement. The moment you hit a natural trail, POP THEM OFF. Stash them in a pocket or your pack. They are road-only equipment.

  • Baskets: Only for muddy, deep scree, or snowy conditions. Their job is to prevent the pole from sinking too deeply into soft ground. On a standard dirt or rocky trail, they are useless and can even get snagged on roots or rocks. Small baskets are for summer trails; large, wide baskets are for snow.

  • Bare Carbide Tip: This is your default setting for 95% of hiking. Gravel, rocky trails, forest floors, hard-packed dirt—this is where the bare, sharp, carbide tip shines. It digs into the ground for superior traction and doesn’t slip. This is the business end of your pole. Let it do its job.

Final Thoughts

Mastering these techniques will transform your trekking poles from awkward, clattering appendages into seamless extensions of your own body.

You’ll hike faster, longer, and with more confidence, all while saving your knees for a lifetime of adventure.

Now, get out there and practice! And if you see someone on the trail using their straps like thumb-traps, pay it forward.

Give them a kind smile and a pointer. Just don’t tell them you learned it from the guy who used to look like a wounded spider.

Leave a Comment

Your email address will not be published. Required fields are marked *

Scroll to Top