10 Sound Bonkers Backpacking Hacks That I Use All The Time

Spread the love

Over the years, I’ve graduated from a wide-eyed newbie who packed a glass jar of pasta sauce “for the flavor” to a slightly-less-wide-eyed enthusiast who has made, and learned from, every mistake in the book.

And the best lessons aren’t always the obvious ones. They’re the weird, counter-intuitive little tweaks that sound ridiculous when you’re safe at home, but feel like a stroke of genius when you’re in the backcountry.

So, from my slightly-muddier-than-yours hands to your eyes, here are 10 backpacking hacks that might not make a lot of sense at first, but are surprisingly useful.

These are the small changes that add up to a huge difference in comfort, organization, and overall trail efficiency.
Let’s get weird.

Table of Contents

Hack 1 – Glue Your Bed to the Floor (Well, Almost)

The Problem: The Nocturnal Migration

You’ve found the perfect, semi-flat spot. You’ve painstakingly inflated your sleeping pad, achieving that Goldilocks-level of firmness.
You drift off to sleep, dreaming of alpine meadows and compliant wildlife.

You wake up several hours later, shivering, with your face pressed against the cold, condensation-covered wall of your tent.
Your sleeping pad, with you on it, has executed a slow, deliberate slide to the lowest corner of your tent floor.

You are now a human slug in a nylon burrito, and it is deeply unpleasant.
This isn’t a failure of your camping skills; it’s basic physics.
Sleeping pads, especially on silnylon or polyester tent floors, have the friction coefficient of a banana peel on a hockey rink.

The Solution: A Doting of Silicone

The fix is absurdly simple. Get yourself a small tube of 100% silicone sealant from the hardware store.
Before your next trip, turn your sleeping pad over and apply a half-dozen or so small dots—about the size of a pea—to the bottom.

Let it cure completely for 24 hours as per the instructions.
What you’ve created is a series of tiny, high-friction grippers.

The Result: A Bed That Stays Put

That’s it. No more sliding. You can now toss and turn with the reckless abandon of a home sleeper.
The silicone grips the tent floor tenaciously, holding your precious sleeping surface right where you want it.

It’s a five-minute modification that saves you from a dozen nightly readjustments and the profound sense of betrayal that comes with waking up on the cold, hard ground.

Hack 2 – Give Your Pillow a Security Blanket

The Problem: The Great Pillow Escape

You’ve solved the sliding pad, but now you have a new nemesis: the fugitive pillow.
You invest in a fancy inflatable pillow, or you stuff your down jacket into a stuff sack, creating a perfect, fluffy cloud for your head.

You lay down, it’s sublime… and then you wake up at 2 AM, your head cricked at a concerning angle, patting the empty space beside you where your pillow once was.
It has, once again, launched itself into the dark abyss of your tent vestibule, probably to conspire with the raccoons.

The Solution: A Fabric Wedgie

This hack requires zero extra gear. Simply take whatever spare clothing you have—a T-shirt, a fleece, a spare pair of socks (clean-ish, preferably)—and use it to create a buffer zone.

Lay the item of clothing over the top of your sleeping pad, then place your pillow on top of it.
Now, tuck the excess fabric up and around the sides of the pillow, effectively creating a fabric cradle that connects the pillow to the pad.

The Benefit: A Unified Sleep System

The friction between the clothing and both the pad and the pillow is enough to keep everything locked together.
Your pillow is no longer an independent agent of chaos; it’s part of the team.

It’s like giving your pillow a security blanket that also happens to be tethered to the bed.
You’ll sleep through the night, and your pillow will be right there with you, not off having adventures of its own.

Hack 3 – The Humble, Mighty, Extra Water Bottle Cap

Why Carry an Extra Cap? Because Hubris is Heavy

“An extra water bottle cap?” I hear you scoff. “What am I, a sherpa for plastic trinkets?” Hear me out.
This is perhaps the most minimalist, multi-use item you will ever carry, weighing in at a whopping 0.1 ounces.
It serves two brilliantly practical purposes that you won’t appreciate until you need them.

First, The Tent Stake Gauntlet. You’re setting up camp. The ground is tough.
You’re hammering in a T-stake with the palm of your hand, a rock, or the bottom of your water bottle.
With every whack, a jolt of pain shoots through your appendage. Enter the cap. Place it over the top of the T-stake.

Now you have a comfortable, wide, plastic platform to push on. Your hands (and your water bottle) will thank you.
It turns a painful chore into a mildly satisfying one.

Second, The Catastrophic Cap Loss. You’re filtering water by a stream. You unscrew the cap from your dirty water bottle.
A sudden gust of wind, a fumble with cold fingers, and plink… your cap is now sailing merrily down the river, embarking on its own thru-hike without you.

Without a cap, your bottle is useless. But wait! You have a spare! You are not a fool.
You are a prepared, cap-hoarding genius. Screw on the replacement and continue your hike, smug in your preparedness.

Hack 4 – Become a Gourmet Scrubber with Veggie Netting

The Problem: The Cryptic, Burnt-on Dinner Residue

You’ve just enjoyed a delicious, rehydrated meal of… well, beige mush. But it was your beige mush, and it was hot.
Now you’re left with a pot that looks like it was used to tar a roof. You have a sponge, but it’s already dubious, harboring a microbiome that would interest the CDC.

You try the “backcountry method” of using leaves or pine needles, which mostly just smears the gunk around and adds a festive, arboreal texture to your next morning’s oatmeal.

The Solution: Raid the Produce Aisle

Next time you’re at the grocery store, don’t just toss that plastic mesh bag your onions or garlic came in. Cut a small square of it, about 4×4 inches.

This is your new backcountry scrubber.

Why It Works: Aggressive Yet Gentle

The plastic netting is abrasive enough to scrape off burnt-on food with a little bit of water, but it’s not so harsh that it will scratch the coating off your nice titanium or aluminum pot.
It’s smaller, lighter, and dries infinitely faster than a gross, damp sponge.

After use, you can just rinse it out, give it a shake, and stow it in a tiny Ziploc bag until its next use.
It’s far more effective than foraging for cleaning supplies and makes the dreaded chore of washing up almost… tolerable.

Hack 5 – Drink the Fat, Hike the Mountain

The Importance of Calorie Density: A Love Story

When you’re backpacking, your body becomes a furnace. You are burning calories at a rate that would make a marathon runner blush.
The problem is, you can only carry so much food. This is where calorie density becomes your best friend.
And fat, my friends, is the undisputed king of calorie density.

Carbs and proteins offer about 4 calories per gram. Fat?
A glorious 9 calories per gram. More than twice as much. Your body needs it for long-term energy, joint health, and keeping you warm.
Yet, so many backpacking meals are carb-heavy.

The Solution: The Olive Oil Shots

I carry a small, leak-proof Nalgene bottle filled with extra virgin olive oil.
At dinner, I pour a generous glug—about two tablespoons—right into my rehydrating meal.

That’s an effortless 250 extra calories right there.
It doesn’t significantly change the texture, and it often makes the meal richer and more satisfying.

It’s the easiest, lightest way to ensure you’re not running a massive calorie deficit, which is the fast track to feeling miserable, weak, and “bonking” on the trail the next day.

You’re fueling the machine. And sometimes, the best fuel is a liquid one that also makes your dehydrated lasagna taste slightly less like cardboard.

Hack 6 – Become a Master of Volumetrics with Your Spork

The Problem: The Unmarked Pot of Mystery

Your lightweight pot is a marvel of engineering. It’s also as blank as a zen master’s mind. It has no volume markings.
The recipe on your dinner packet says “add 2 cups (475ml) of water.”
How the heck are you supposed to know what that looks like?

You guess, which leads to dinner being a soupy mess or a crumbly, arid disaster.
You could use your water bottle to measure, but what if your bottle is a different size?
This is a first-world problem that feels very much like a backcountry crisis.

The Solution: Engrave Your Utensil

Take your trusty spork (or spoon, let’s not start a civil war here). Using a knife or the point of your tent stake, carefully scratch two small, shallow lines into the handle.

Don’t go too deep; you’re not whittling a canoe.
The first line is for one cup (or 250ml). The second is for two cups (500ml).

Why on the Spork? Sheer, Unadulterated Genius.

First, you’re not damaging your pot’s non-stick coating.
Second, your spork is always with your cook kit, so it’s always there when you need it.
Third, it’s consistent.

Even if you change water bottles or pots, your spork remains the constant, the Rosetta Stone of your backcountry kitchen.

No more guesswork, just perfectly hydrated meals every time. It’s the kind of precision that makes you feel like a backcountry Gordon Ramsay (but hopefully nicer).

Hack 7 – Let a Water Bottle Be Your Spirit Level

The Problem: The Deceptively Slanted Campsite

Your eyes are liars. A patch of ground can look as flat as a pancake until you lay down on it, at which point you realize you’ve pitched your tent on a subtle but persistent incline designed to slowly drain all the blood to your head (or your feet) all night long.

Waking up with a headache and the feeling that you’ve been sleeping on a funhouse mirror is a classic backpacking experience, but it doesn’t have to be.

The Solution: A DIY Clinometer

You don’t need a fancy level. You have a water bottle. Fill it about halfway, so you have a clear water line.
Place it on the ground where you’re thinking of pitching your tent. Get down on your hands and knees and observe the water line.

Is it parallel to the horizon? Great!

Now, move the bottle a quarter-turn and check again. Do this in a few spots. If that water line stays consistently level, you’ve found your spot.

The Advantage: Objective, Unbiased Data

This method cuts through the visual deception of tired eyes. It gives you a clear, physical reference point.

It’s especially invaluable in mountainous terrain where truly flat ground is a myth, and you’re just looking for the least inclined option.

It takes 30 seconds and saves you from a night of futilely scooting up your sleeping pad every hour.

Hack 8 – Lie Down on the Job Before You Pitch the Tent

Keep Your Tent Floor Dry

After Clearing the Ground: The Pre-Pitch Recliner

You’ve found a spot that passed the water bottle test. You’ve swept away the obvious rocks and sticks.
The standard procedure is to now immediately pitch the tent. I am here to tell you to resist this urge.

Instead, lay out your tent’s footprint or just the tent body itself (if it’s a single-walled tent).
Then, you, yes YOU, lie down on it.

Why: A Butt-On-Ground Assessment

This does two things. First, it lets you find the perfect sleeping direction. Maybe there’s a slight slope, but you discover you sleep better with your head pointing east.

Maybe there’s a root you missed that’s now jabbing you in the kidney. Maybe there’s a subtle dip right where your hips would go that you couldn’t see, but your spine can definitely feel.

Second, it prevents the ultimate backcountry frustration: fully pitching your tent, moving your gear inside, and then discovering a pointy rock the size of a fist directly under your lower back.

Now you have to de-pitch, move everything, and start over. Lying down first is a two-minute investment that saves you twenty minutes of swearing and wasted effort.
It’s a dress rehearsal for the most important part of camping: sleeping.

Hack 9 – Turn Your Tent into a Chandelier-Lit Salon

The Trick: A Zipper-Based Lighting Fixture

This one is so simple it feels like cheating. On most double-door tents, the inner mesh door has two zippers that meet in the middle.
When you open the door, you end up with two zipper pulls at the top corners.
Here’s the magic: don’t let them dangle separately. Keep both zipper cords attached to each other at the top, creating a little “V” shape.

Now, take your headlamp or flashlight. Turn it on, and hang it from the junction of those two zipper pulls, so it dangles in the very center of your tent.

The Benefit: Ambient, Hands-Free Illumination

Voilà! You have just installed a tent lantern.
The light bounces off the reflective tent walls, providing a soft, ambient glow that illuminates the entire space, eliminating harsh shadows and making it easy to read, organize your gear, or find that missing sock.

It’s always right there at the door, impossible to lose in the dark.
As a bonus, you can also hang your glasses from the same spot, ensuring you won’t roll over on them in the night and you’ll know exactly where they are for that 2 AM “what was that noise?” peek outside.

Hack 10 – The Dreaded, Glorious, Torso-Drying Technique for Socks

The Problem: The Soggy Sock Saga

You’ve forded a stream, been caught in a downpour, or just have impressively sweaty feet.
You arrive at camp with a pair of socks that are functionally aquatic creatures.

Hanging them on the outside of your pack to dry during the day was futile.
They are cold, wet, and miserable. The thought of putting them on again in the morning is enough to make you consider just hiking in camp shoes, blisters be damned.

The Solution: Embrace the Cuddle of Despair

This is the hack that separates the weekend warriors from the hardened trail veterans.
It sounds disgusting. It feels… intimate. But it works.

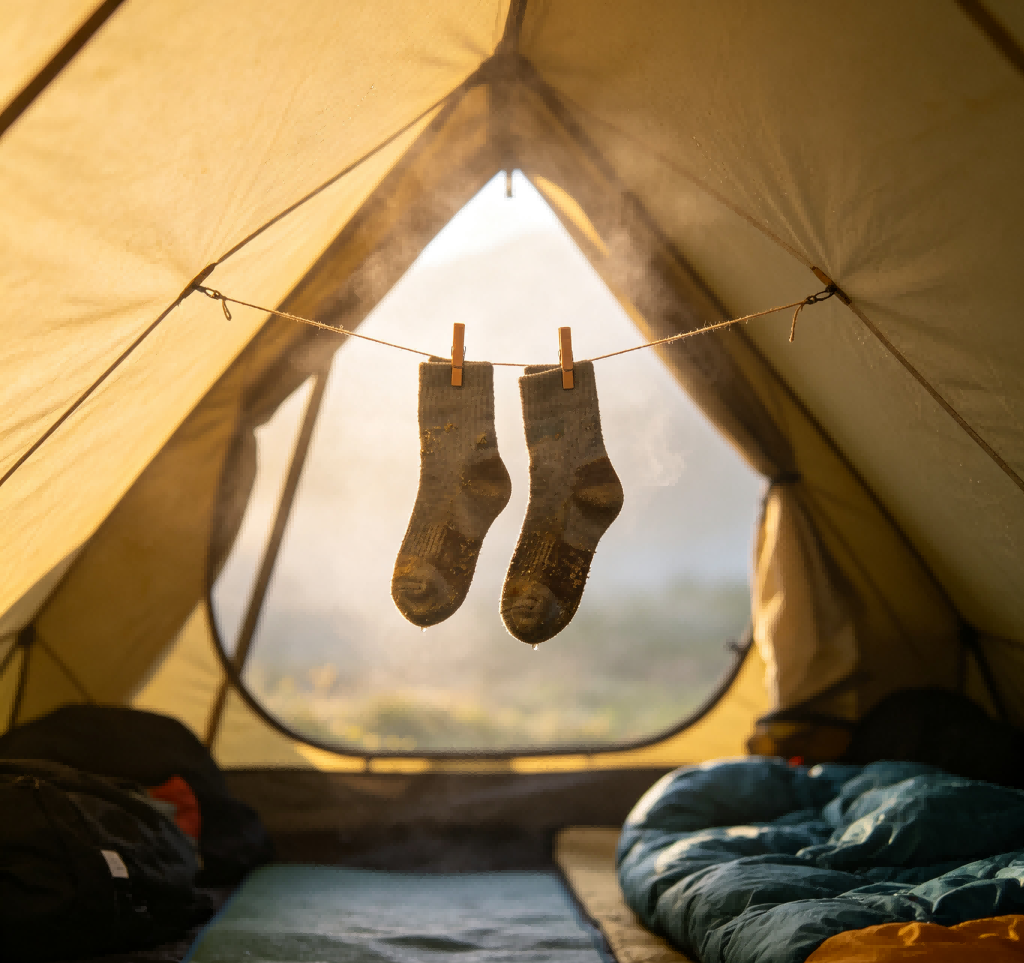
Here’s what you do: right before you go to sleep, take your wet socks, wring them out as best you can, and place them against your torso, underneath your base layer shirt.
Your body heat will act as a low-and-slow dryer.

Why It Works: You Are a Furnace, Remember?

Your core is the warmest part of your body, producing a consistent, radiant heat all night long.
By morning, those socks will be completely dry. Not damp, not sort-of dry, but warm, toasty, and dry.

Yes, the first few minutes are a chilling, unpleasant shock to the system.
You will question all your life choices that led you to this moment.

But you will fall asleep, and you will wake up a hero with dry socks.
I have tested every method—campfire drying (slow and risky), stuffing in a sleeping bag (makes your bag damp), sun-drying (requires sun)—and this is, without a doubt, the most effective.
It’s a testament to the old adage: if it’s stupid but it works, it isn’t stupid.

Wrap-Up

So there you have it. Ten slightly odd, immensely practical hacks to make your next backpacking trip a little more comfortable and a lot less frustrating.
From silicone-dotted pads to torso-dried socks, the backcountry is full of opportunities for MacGyver-like innovation.

Now it’s your turn. I know you have your own weird, wonderful, and probably slightly unhygienic tricks.
What’s the best backcountry hack you’ve ever discovered?
Share it in the comments below—let’s make each other smarter, one ridiculous tip at a time. Happy trails

Leave a Comment

Your email address will not be published. Required fields are marked *

Scroll to Top