19 Thru Hiking Tips for Thru Hike Beginner

Spread the love

Let’s get one thing straight: my first multi-day hike was a disaster of epic proportions.

I have, through a process of trial, error, and profound humiliation, learned a few things.

This isn’t about what brand of tent to buy. This is about the tiny, glorious hacks that make life on the trail feel less like a survival simulation and more like the beautiful, slightly-muddy adventure it’s supposed to be.

I’ve graduated from “clueless newbie” to “slightly-less-clueless enthusiast,” and along the way, I’ve compiled a list of the 19 most practical, nitty-gritty, why-didn’t-I-think-of-that tips for through-hiking.

Table of Contents

1. The Water Filter Hack: Ditch the Medical-Grade Syringe

The Tip: Replace the comically large, medical-looking syringe that comes with your Sawyer water filter with a simple sports cap from a disposable water bottle.

The How-To: When you need to backflush your filter to clear out the gunk, press the sports cap firmly against the clean end of the filter (the side you drink from).

Turn the whole assembly upside down over your water source, and squeeze the living daylights out of the bottle.

The concentrated jet of water does a surprisingly good job of blasting out most of the debris. It’s not quite the powerful, piston-like perfection of the official syringe, but it’s about 1/10th the size and weight.

The Efficiency: Think of the syringe as a firehose and the sports cap as a high-pressure garden hose nozzle.

It’s a brilliant backup for cleaning and works well enough to keep you hydrated without carrying what looks like a prop from a veterinary drama.

2. Sock Drying: Become a Human Clothes Dryer

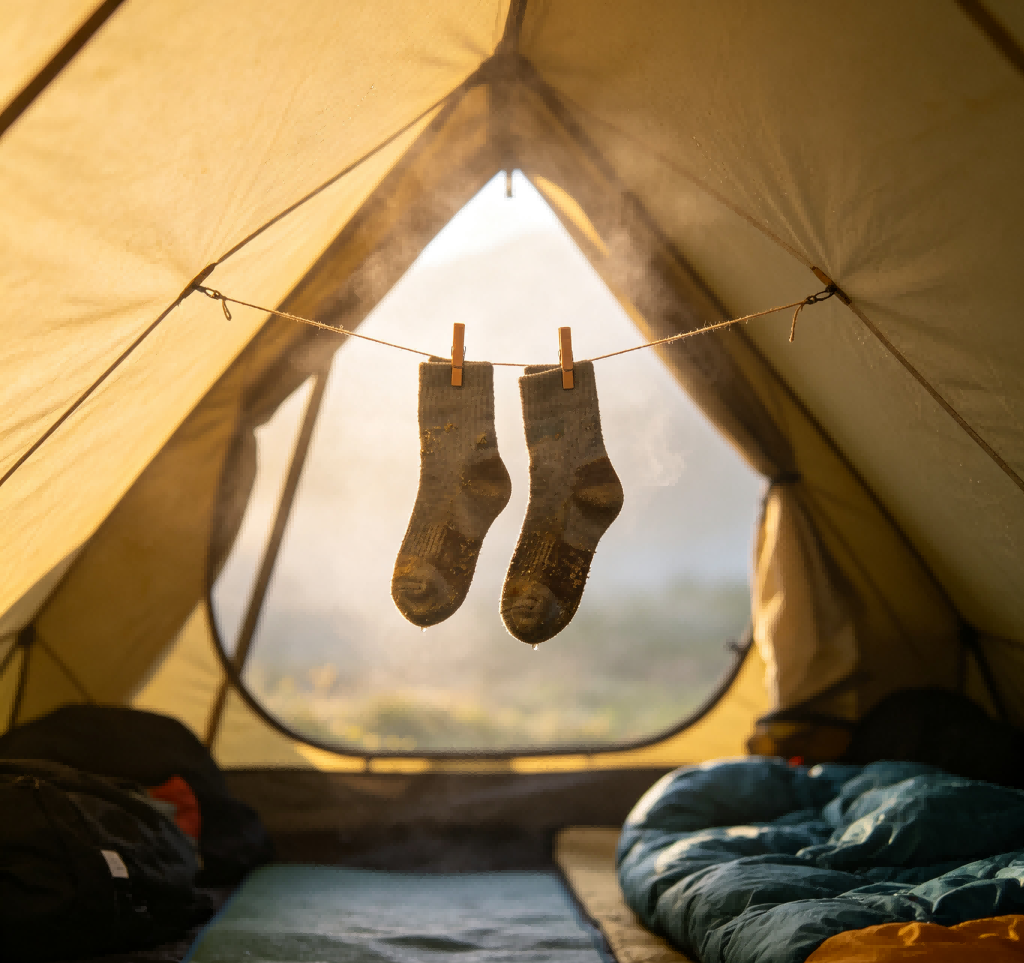
The Tip: Instead of hanging your wet, sad socks on your pack or a tree branch where they’ll mock you with their dampness by morning, shove them under your shirt when you go to sleep.

The How It Works: Your body is a magnificent, walking, sleeping furnace. Sticking your cold, wet socks against your core (I prefer the lower back or stomach) feels terrible for about 30 seconds.

Then, your body’s innate desire not to be cold takes over. By morning, through the miracle of your own metabolic output, you’ll have a pair of toasty, dry socks.

It’s a little gross, sure, but so is trench foot. Choose your battles.

3. Timing Mountain Passes: Don't Tango with Thor

The Tip: Hike over exposed mountain passes in the afternoon, not the morning.

The Why: In the mountains, the sun acts like a giant cosmic stove, heating the ground, which heats the air, which then rises and creates spectacular, terrifying afternoon thunderstorms.

This typically happens between noon and 4 PM. Being on a high, exposed pass during this time is like standing on a giant lightning rod while holding two smaller, metal lightning rods (your trekking poles).

It’s a recipe for a very bad, very shocking day.

Let the weather do its angry dance while you’re safe in the trees, then cruise over the pass once the sky has calmed down.

4. Restoring Your Water Filter: A Vinegar Spa Day

The Problem: Over time, your hollow fiber membrane filter (like a Sawyer or Katadyn) will get clogged not just with mud, but with hard water minerals like calcium.

Backflushing helps with the mud, but it can’t dissolve the rock-like mineral deposits slowing your flow to a pathetic trickle.

The Solution: Give your filter a spa day! Soak it in a mild vinegar-water solution. A ratio of about 5 parts water to 1 part white vinegar is perfect.

The How: Mix up your solution in a clean jar or pot. Submerge your filter for about an hour. Then, use the solution to backflush the filter, just like you normally would.

You’ll be amazed as the flow rate returns to its former glory. It’s like giving your filter a double espresso shot.

Just remember to do a final backflush and rinse with clean water afterward, unless you fancy a subtle vinaigrette finish to your next sip of stream water.

5. Calorie Intake: Become an Oil Slick

The Tip: Focus on calorie-dense, healthy unsaturated fats to power your engine without carrying a ton of weight.

The How: For breakfast, go wild with peanut butter. Slather it on everything, or just eat it by the spoonful. Add nuts to your oatmeal.

For dinner, this is the real pro-move: carry a small, leak-proof bottle of olive oil.

After you’ve cooked your meal, glug a generous tablespoon or two of oil right into your couscous or mashed potatoes.

It adds a huge number of calories, makes the food more satisfying, and keeps your joints happy.

You’re not just a hiker; you’re a high-performance, lipid-powered machine.

6. Affordable Hiking Meals: Boycott the $15 Freeze-Dried Brick

The Tip: Avoid the wallet-murdering, expensive pre-packaged dehydrated meals.

The Alternative: Hit the aisles of a local grocery store. My staples are couscous (it cooks instantly), quinoa, instant rice, and instant mashed potatoes.

For protein, texturized vegetable protein (TVP) is cheap, light, and fantastic.

Ramen bombs (ramen + instant potatoes) are a trail classic for a reason.

The Flavor: Don’t be a savage. Pack a tiny baggie of your favorite spices.

Salt, pepper, garlic powder, and a curry or chili powder blend can transform a bland glop into a gourmet trail feast.

You’ll save a fortune and eat better.

7. Ziploc Bags: The Holy Grail of Organization

The Tip: Bring at least 10 Ziploc bags, in various sizes. Do not question this. Just do it.

The Why: That bag of couscous from the bulk bin? The box of quinoa? Ditch the packaging immediately.

Pour everything into clearly labeled Ziploc bags. They conform to the space in your pack, they’re waterproof(ish), they weigh nothing, and they keep your food bag organized.

You can also use them for trash, wet fire starters, or protecting your phone in a downpour.

They are the duct tape of the container world.

8. The Pre-Hike Produce Gorge

The Tip: Right before you leave town, buy and immediately consume a ridiculous amount of fresh fruits and vegetables.

The Benefit: You get a massive hit of vitamins, fiber, and morale-boosting freshness without carrying a single ounce of it on the trail.

Sitting on the curb outside a grocery store, devouring an entire watermelon, two apples, and a bag of baby carrots is not only socially acceptable in the hiker world, it’s encouraged.

You’re not a glutton; you’re a strategic nutrient-loading organism.

9. Headphones: Your Shield Against the Snore-A-Saurus Rex

The Tip: Always, always, always pack headphones, even if you’re an “I-hike-to-get-away-from-technology” person.

The Why: You will, at some point, end up in a shelter or a crowded campsite next to someone whose snoring is a legitimate force of nature.

It’s not just loud; it’s complex, with gurgles, whistles, and sudden, window-rattling explosions.

A pair of simple earbuds, playing white noise or a boring podcast, is the difference between a night of homicidal fantasies and a restful sleep. Trust me.

10. The Water Bottle Hack: Keep It Simple, Stupid

The Tip: Use two standard, disposable-style plastic water bottles (like Smartwater bottles) instead of a bladder or special pouch.

The How: One bottle is for “clean” water. The other is for “dirty” water. When you need to filter, you simply screw your filter (like a Sawyer Squeeze) directly onto the dirty bottle, and drink from it, or squeeze it into your clean bottle.

It’s foolproof. Bladders are a mystery—you never know how much water is left, and they are a nightmare to clean.

Bottles are simple, durable, and you can see your supply at a glance.

11. The Mini Gear Repair Kit: Be Your Own Trail MacGyver

The Tip: Assemble a tiny, lightweight repair kit containing seam grip, a small roll of duct tape (wrap it around your trekking pole or water bottle), a needle, and some strong dental floss.

The Use: A pinhole leak in your inflatable sleeping pad? Seam grip.

A tear in your rain jacket? Duct tape patch. A blown strap on your pack? Sew it back together with the needle and floss (which is surprisingly strong).

This kit weighs ounces but can save a trip, transforming you from a helpless victim into a backcountry superhero.

12. The Summer Sleeping Pad: Embrace the Foam

The Tip: In the summer, consider using a simple closed-cell foam pad (like a Z-Lite or RidgeRest) instead of an inflatable one.

The Why: It’s lighter. It never, ever springs a leak. It’s completely silent (no crinkly-inflatable noises when you move).

And the best part? You can instantly take it off your pack to sit on during breaks without any tedious inflating or deflating.

It’s the ultimate in lazy, efficient comfort.

13. Trekking Poles: Your Four-Wheel Drive

The Tip: Use trekking poles. Seriously. Just do it.

The Benefit: They provide stability on sketchy descents, river crossings, and slippery rocks.

They save your knees on brutal downhills by absorbing a huge amount of impact.

And they are your first line of defense against an over-enthusiastic shepherd dog or a curious, but not-too-bright, raccoon.

I’ve waved my poles to scare off more fauna than I can count. They are an extension of your limbs.

14. The Down Jacket Hood: The Hat That's Already There

The Tip: If your down or synthetic puffy jacket has a built-in hood, use that instead of packing a separate beanie.

The Why: A good puffy hood is like a beanie that also covers your neck and the sides of your face.

It’s incredibly warm, and by using it, you’ve just saved the space and weight of an extra item.

It’s the ultimate in multi-use gear.

On a cold morning, cinching that hood down until only my eyes are visible is one of life’s great simple pleasures.

15. Small Gloves: The Item You'll Curse Yourself for Forgetting

The Tip: Always, and I mean always, pack a pair of light gloves.

The Why: You might be hiking in the desert. You might be hiking in July. Pack the gloves. Cold hands on a chilly, windy ridge at 5 AM are miserable.

Handling a cold, metal stove in the evening is miserable. Fumbling with tent zippers with numb fingers is miserable.

They weigh nothing and pack down to the size of a walnut. Forget them once, and you’ll never make that mistake again.

16. The Hiking Journal: Remember the Little Things

The Tip: Pack a tiny notebook and a pen.

The Why: Your phone will die. Your memory is fallible. A journal lets you jot down crucial notes: “Need new socks, these are dead,” “Town X has terrible resupply,” “That brand of tuna packets tastes like regret,” “Mile 234.5 – most beautiful view of the trip.”

It’s a low-tech, reliable way to track your journey, your gear performance, and your sanity. It’s also a wonderful thing to look back on.

17. The Large Dry Sack: One Bag to Rule Them All

The Tip: Use one large, lightweight dry sack as a pack liner to keep all your gear dry, instead of using individual rain covers for your pack or stuff sacks.

The Why: Rain covers are great until a strong wind turns them into useless, flapping kites, or until you brush against a wet bush that soaks your pack from the inside.

A large dry sack acts as a waterproof core for your pack. You just stuff your sleeping bag, clothes, and down jacket into it, roll the top down, and you have peace of mind. It’s simpler and more foolproof.

18. The Surgeon's Knot: For Shoes That Stay Tied

The Tip: Learn and use the surgeon’s knot for the initial tie of your shoes.

The How: You start tying your shoe normally (make a loop, wrap the other lace around it), but instead of pulling it tight after one wrap, you wrap the lace around twice before pulling it through the hole.

Then you finish with a standard bow. This creates an incredibly secure initial knot that resists coming loose all day, even on rough terrain.

It’s a game-changer for people whose laces constantly untie themselves.

19. Lacing for Toe Room: Give Your Piggies Space

The Tip: If you have a wide forefoot or get toe bang on descents, use a lacing technique to open up the toe box.

The How: Lace your shoes normally until you get to the bottom two eyelets (the ones closest to your toes).

Instead of crossing the laces, run them straight up to the next set of eyelets, effectively “skipping” a cross.

Then, tie your shoe normally (preferably with a surgeon’s knot!) from there. This creates a noticeable increase in volume over the top of your foot, giving your toes room to splay and breathe.

Conclusion

Well, there you have it. Twenty tips forged in the crucible of my own ineptitude and subsequent learning.

These small, practical changes have saved me weight, time, sanity, and on at least one occasion, from a lightning-induced perm.

I hope you find them as useful as I have. This is by no means an exhaustive list—the trail is a constant teacher.

Leave a Comment

Your email address will not be published. Required fields are marked *

Scroll to Top